Authorize AI Agents with Nango
How to authorize AI agents with a credential store

Introduction
One of the biggest challenges in building AI agents is authorizing them to access external services. Many routine yet tedious tasks handled by humans often require multiple authorizations across different providers.
For example, if you want an agent to automatically issue refunds to your customers, it may need permission to:
- Access your company’s bank account (to transfer funds)
- Connect to your email provider (to send a refund confirmation)
- Connect to your SMS service (to send a refund notification)
- Update your CRM (to adjust the customer’s status)
- Update your accounting software (to log the transaction)
- Update your inventory system (to adjust stock levels)
- Update your shipping software (to manage fulfillment)
These are just a few examples. Each of these services can be provided by different vendors, and the agent must be authorized to access them all. To complicate matters, every provider has its own authentication mechanism.
This is exactly where Nango comes in.
How to authorize AI agents with Nango
Nango makes authorization simple through two core features:
- A frontend SDK that lets users securely grant agents permission to act on their behalf.
- A backend service that retrieves and manages these credentials so agents can perform their tasks seamlessly.
Example: Confluence Integration
Let’s walk through a Confluence integration example.
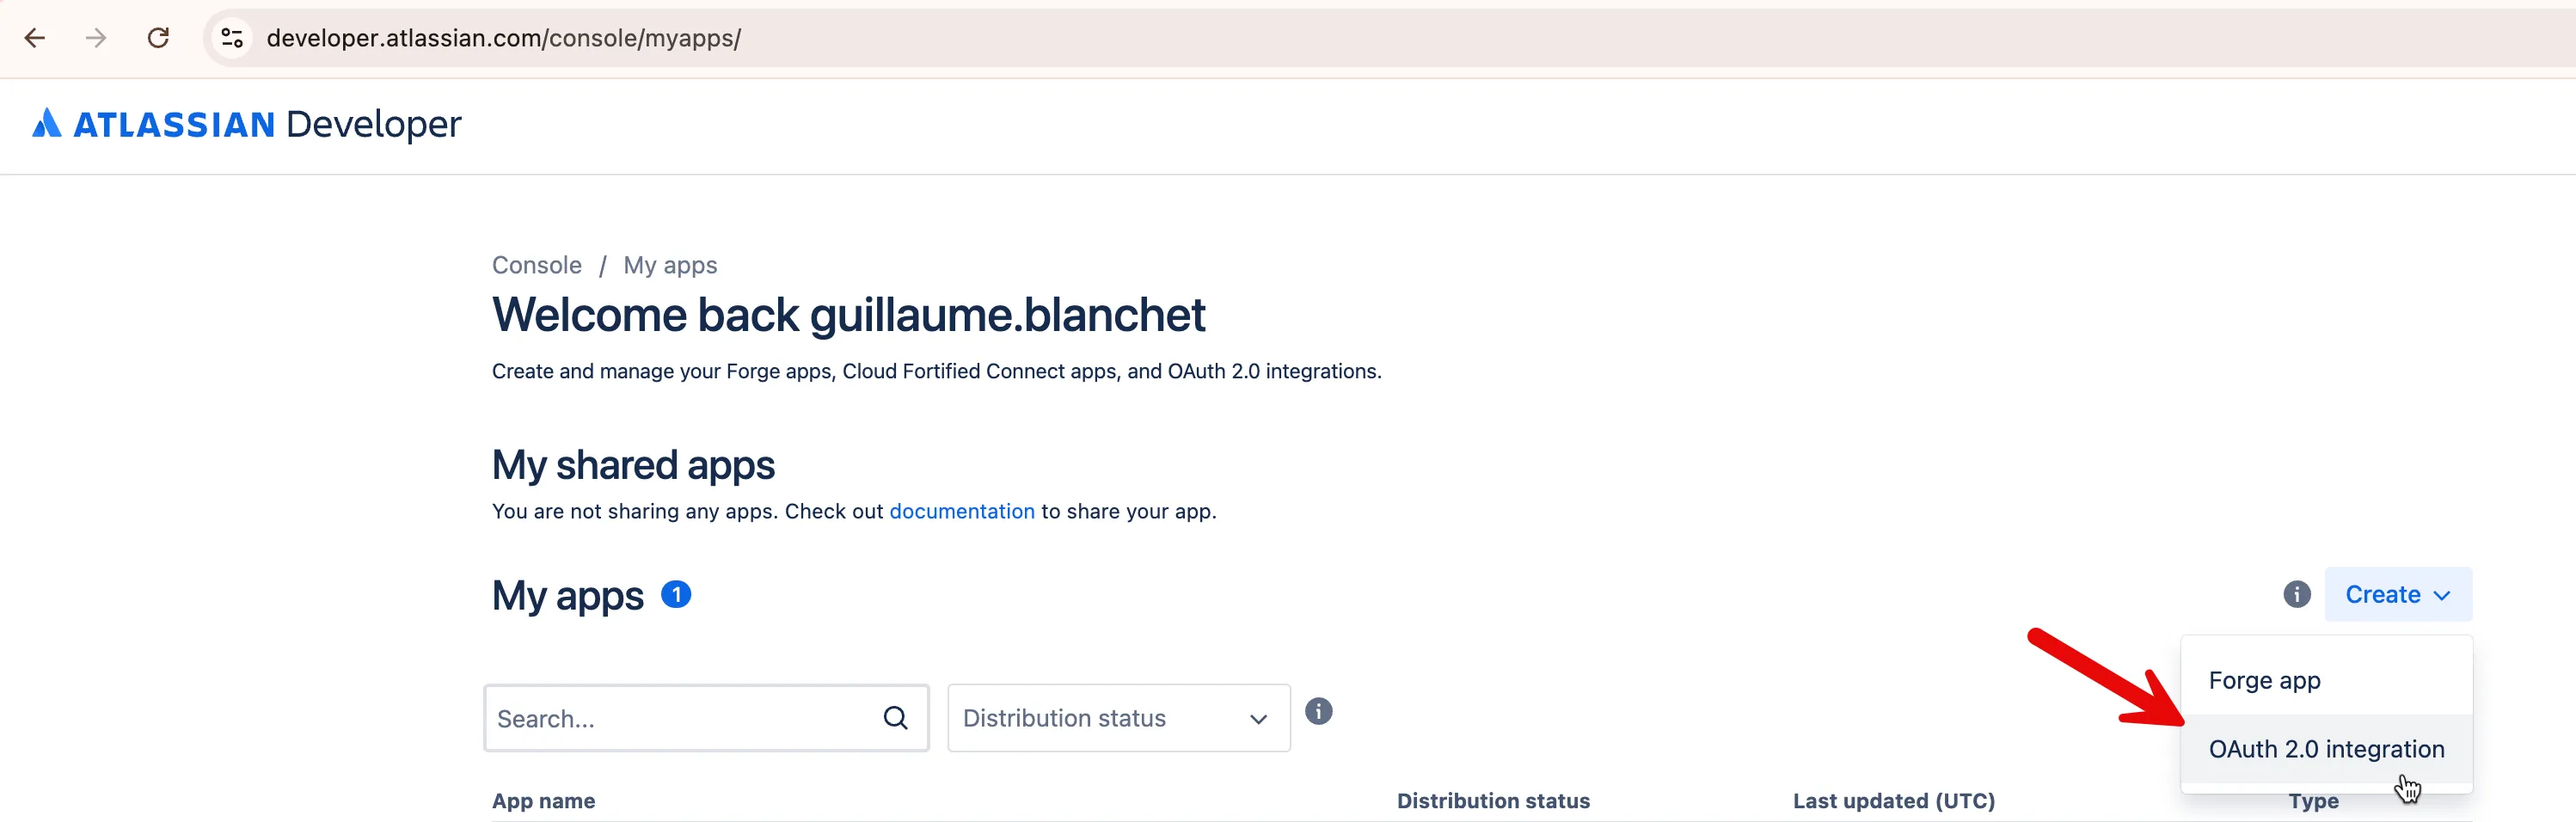
1. Create a Confluence app
Go to the Atlassian app page and create a new app:
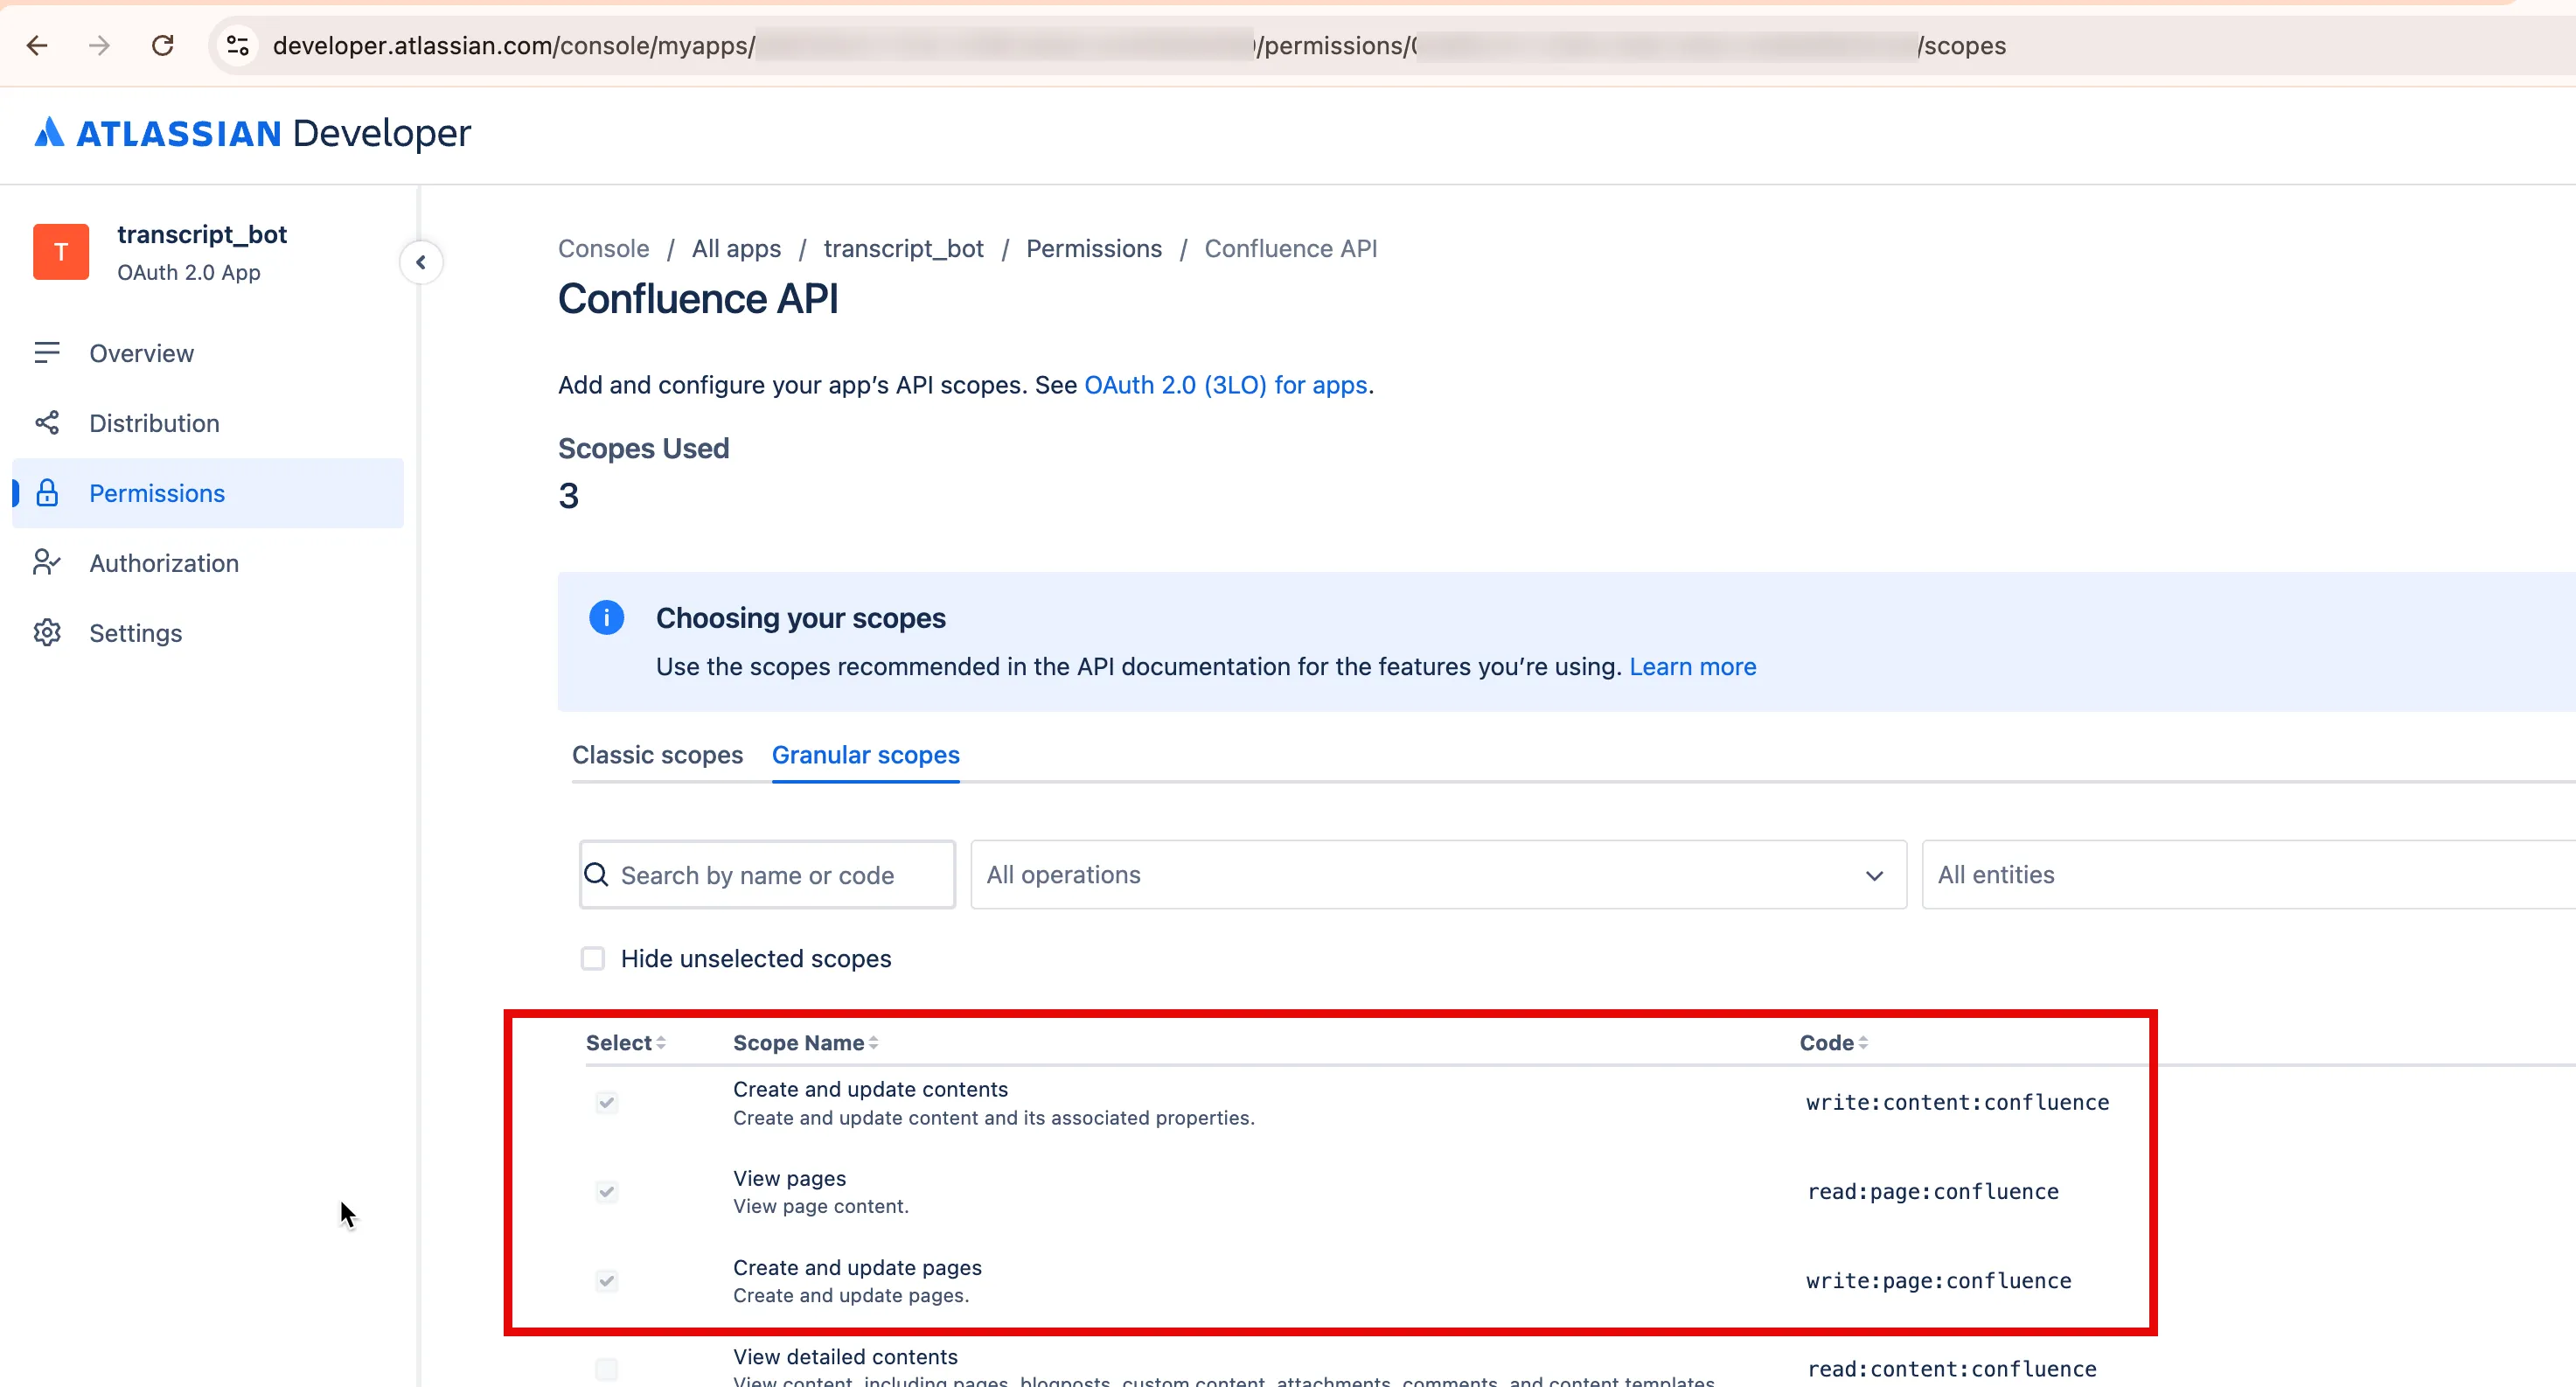
2. Assign the required permissions
Since we’ll test the integration by creating a Confluence page, the app needs the proper scopes:
3. Configure the Nango callback URL

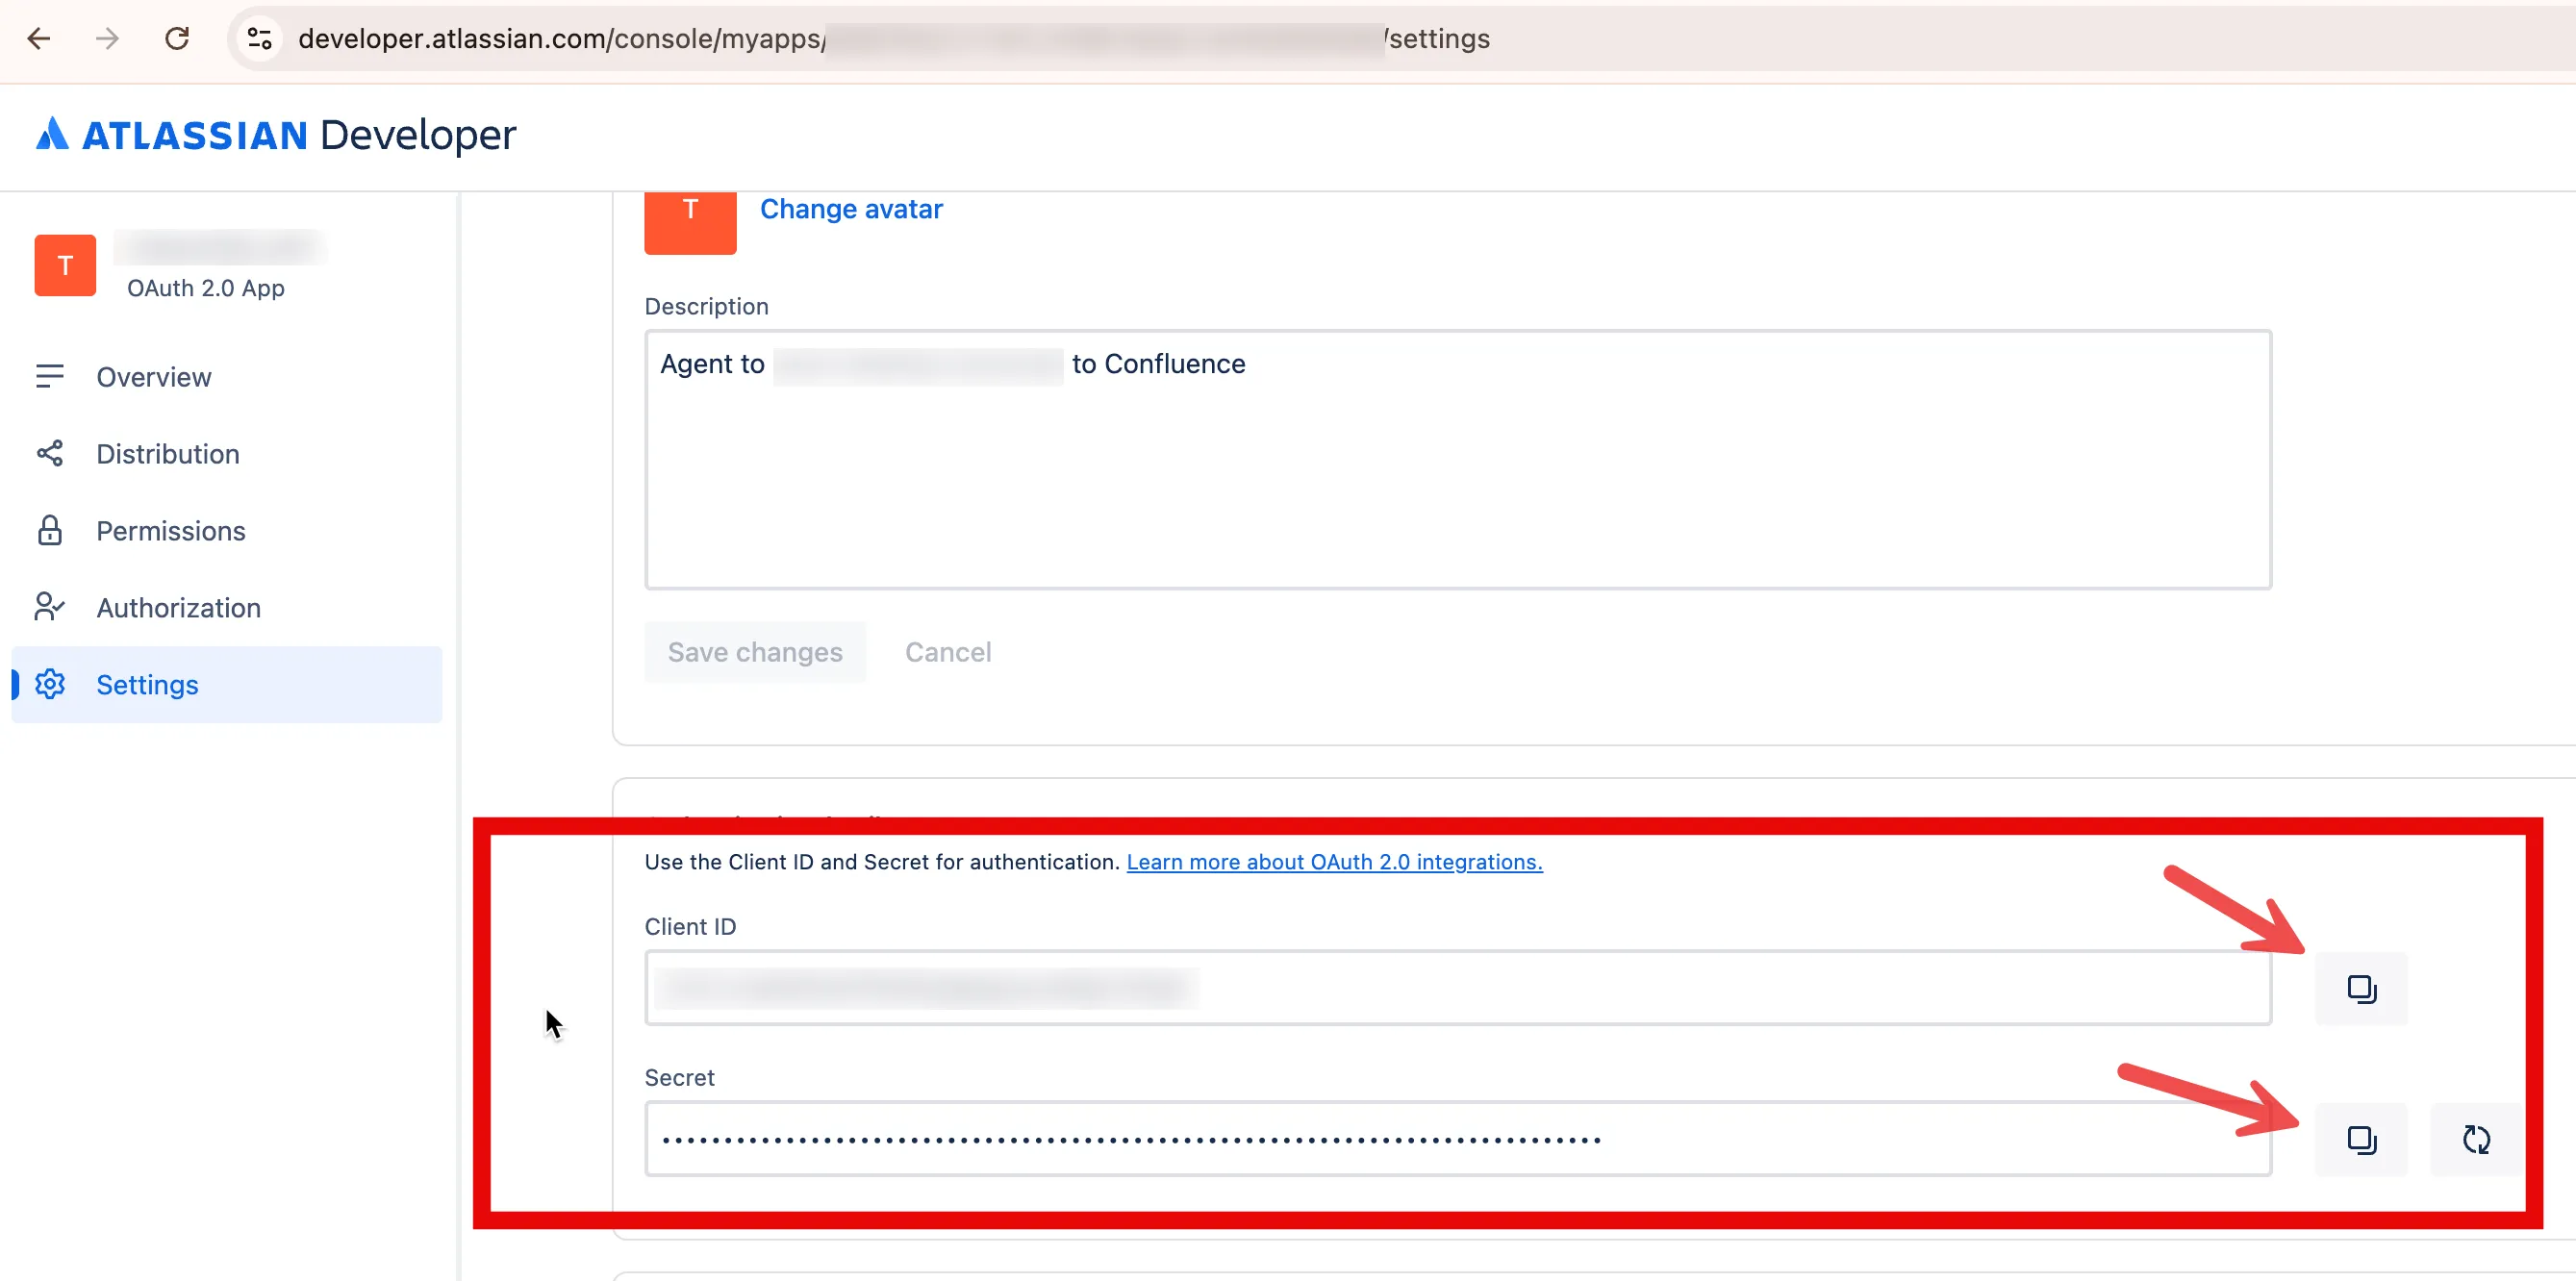
4. Copy the client ID and client secret
You’ll need these values for Nango to authenticate users:
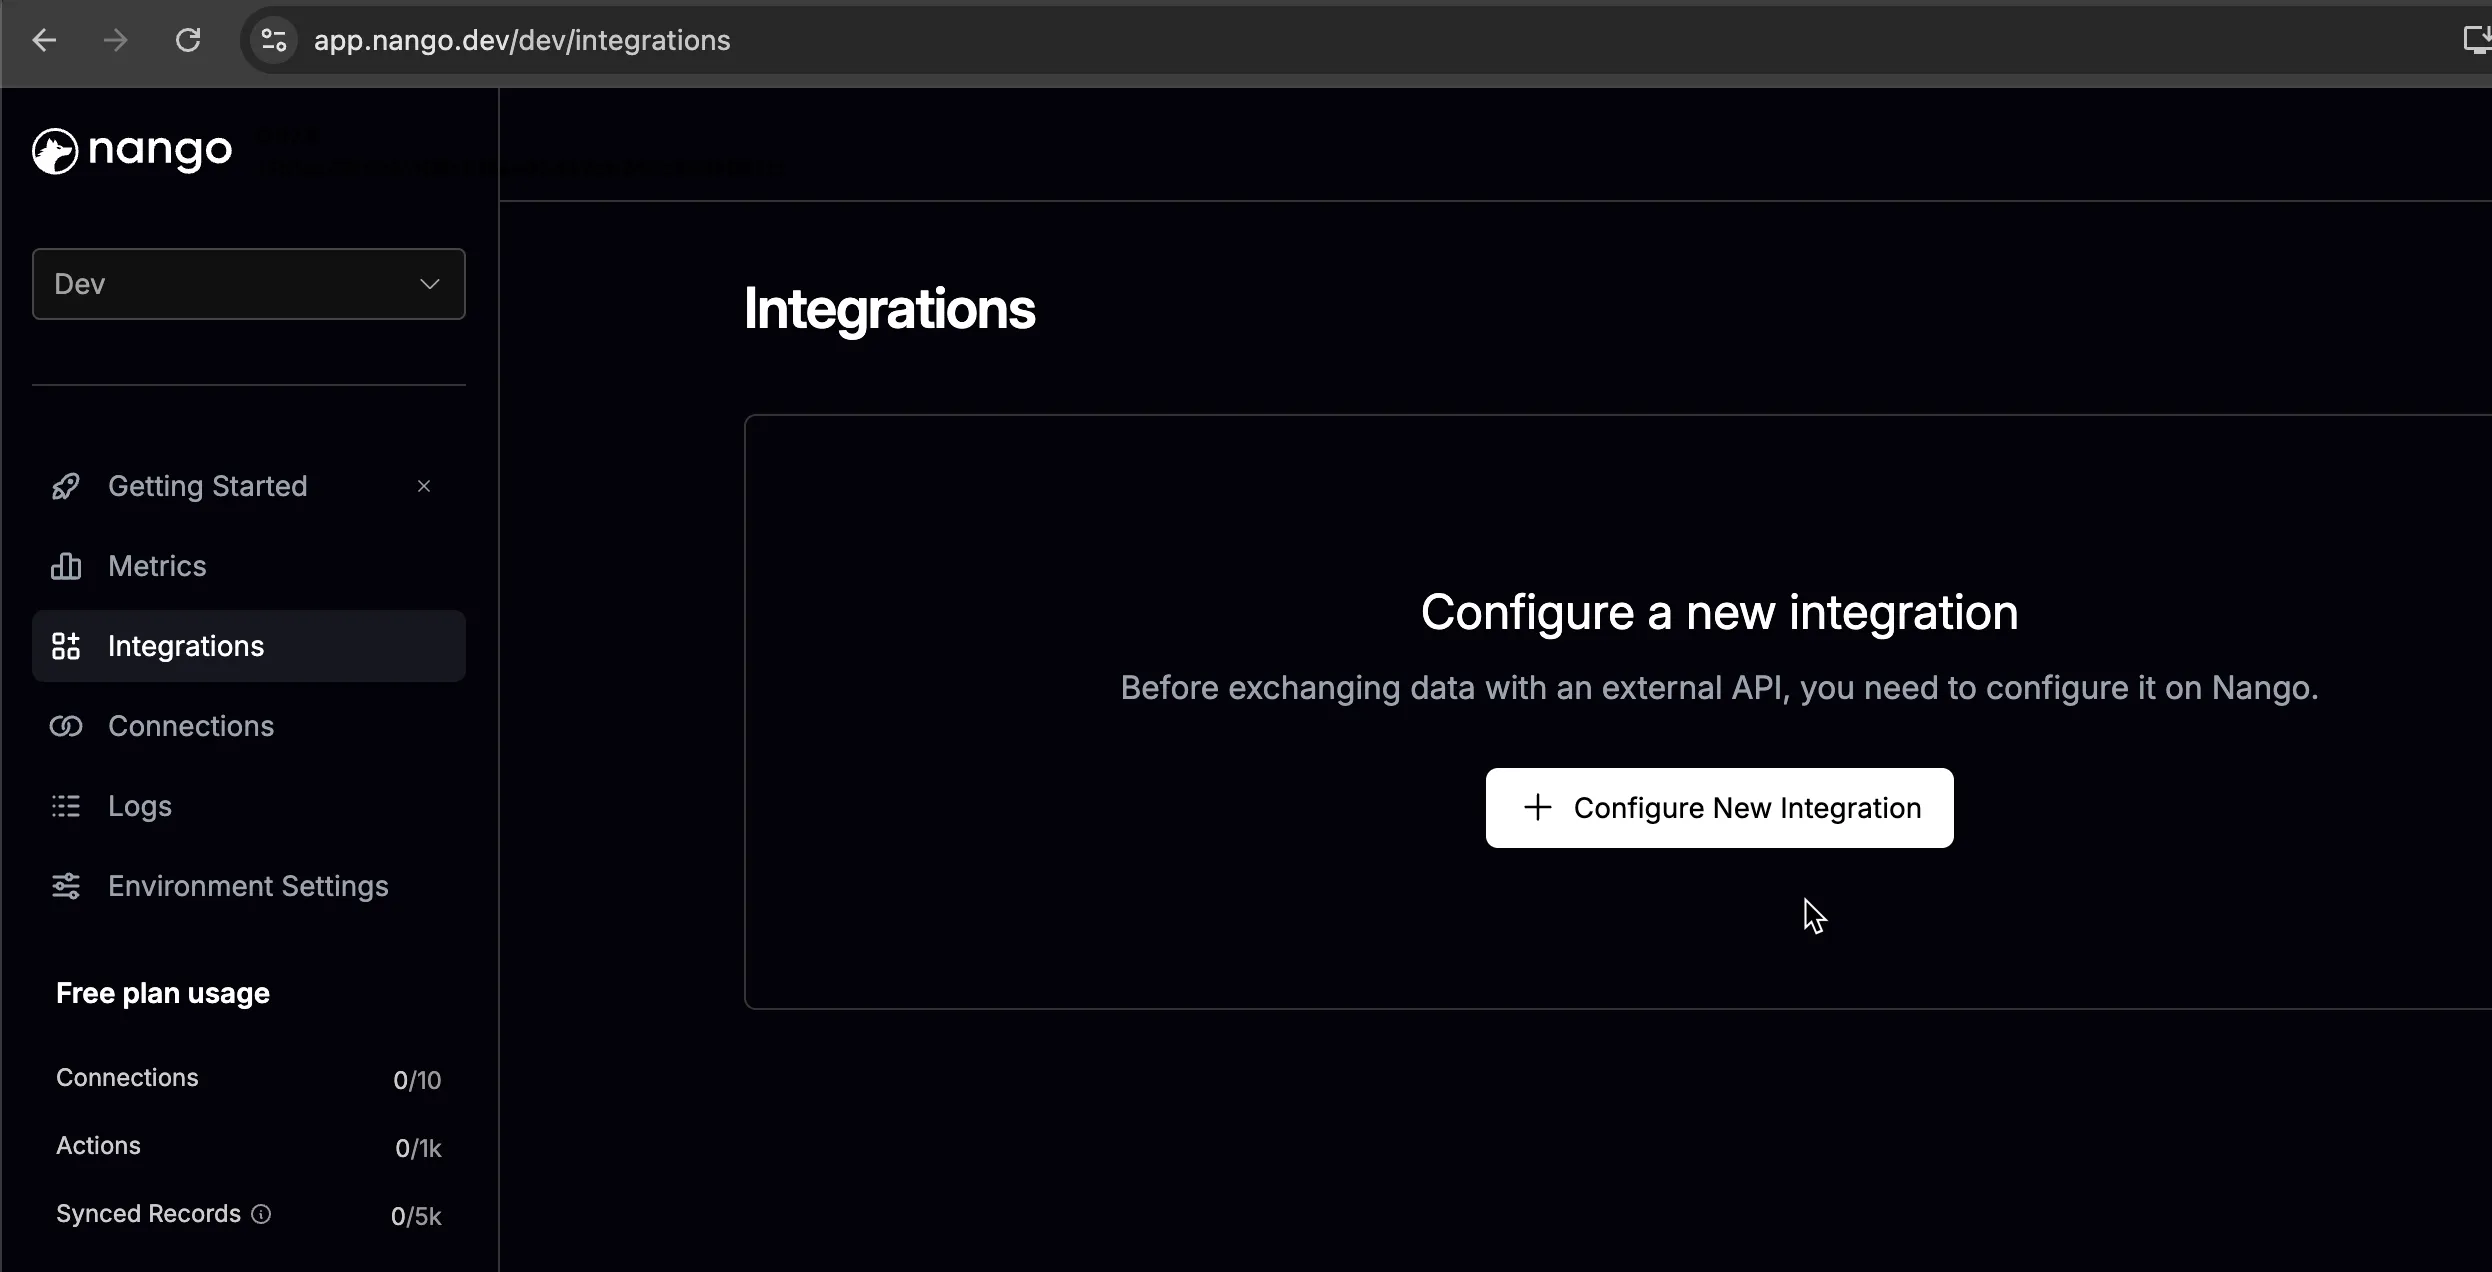
5. Configure the Nango integration
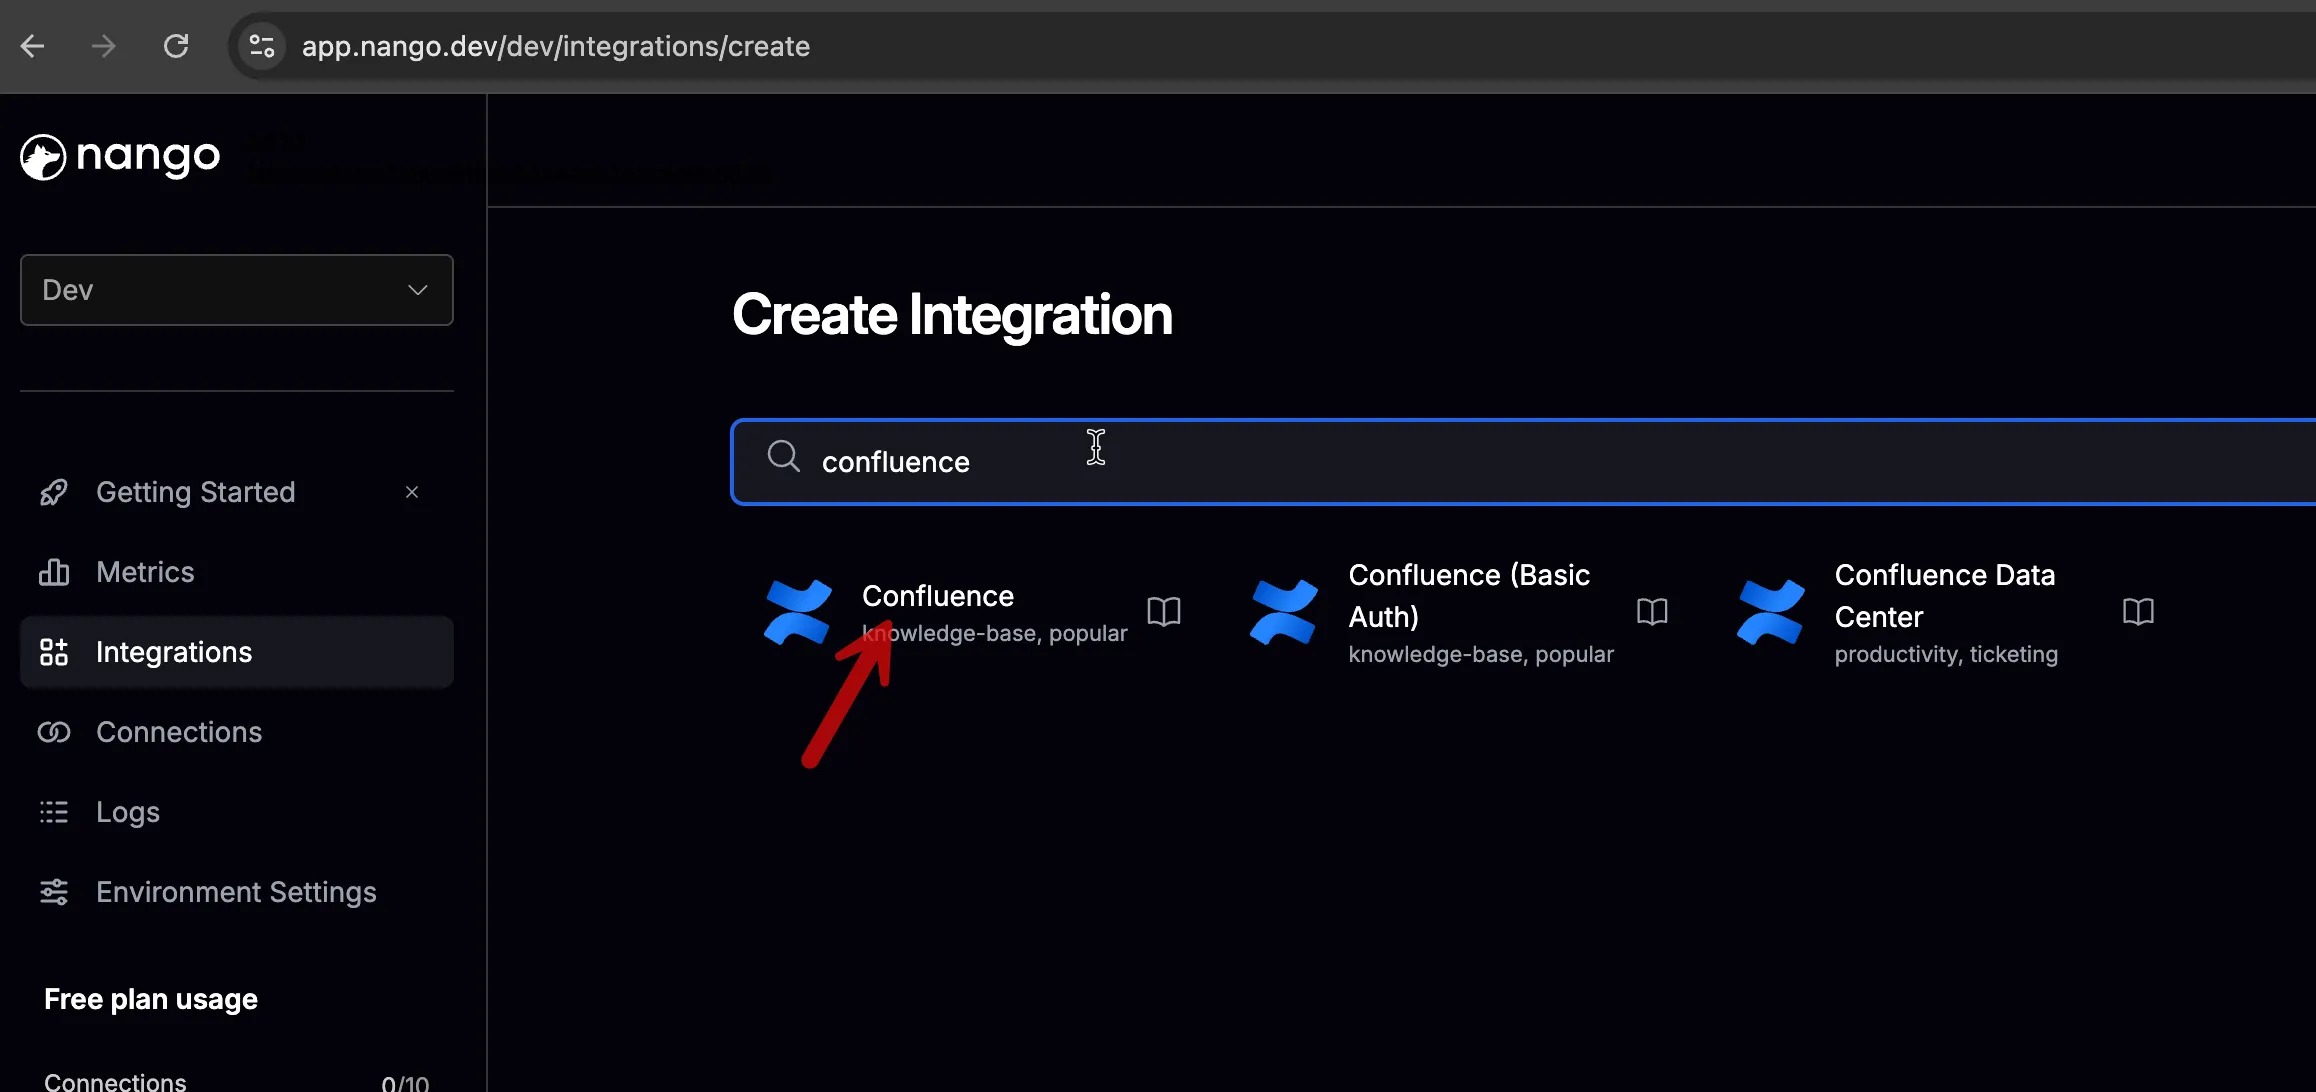
Open the Nango integrations tab and click + Configure New Integration:
Select Confluence:
6. Set up the integration
Enter the Confluence App Client ID and Client Secret into Nango. Make sure the scopes match those configured in step 2.
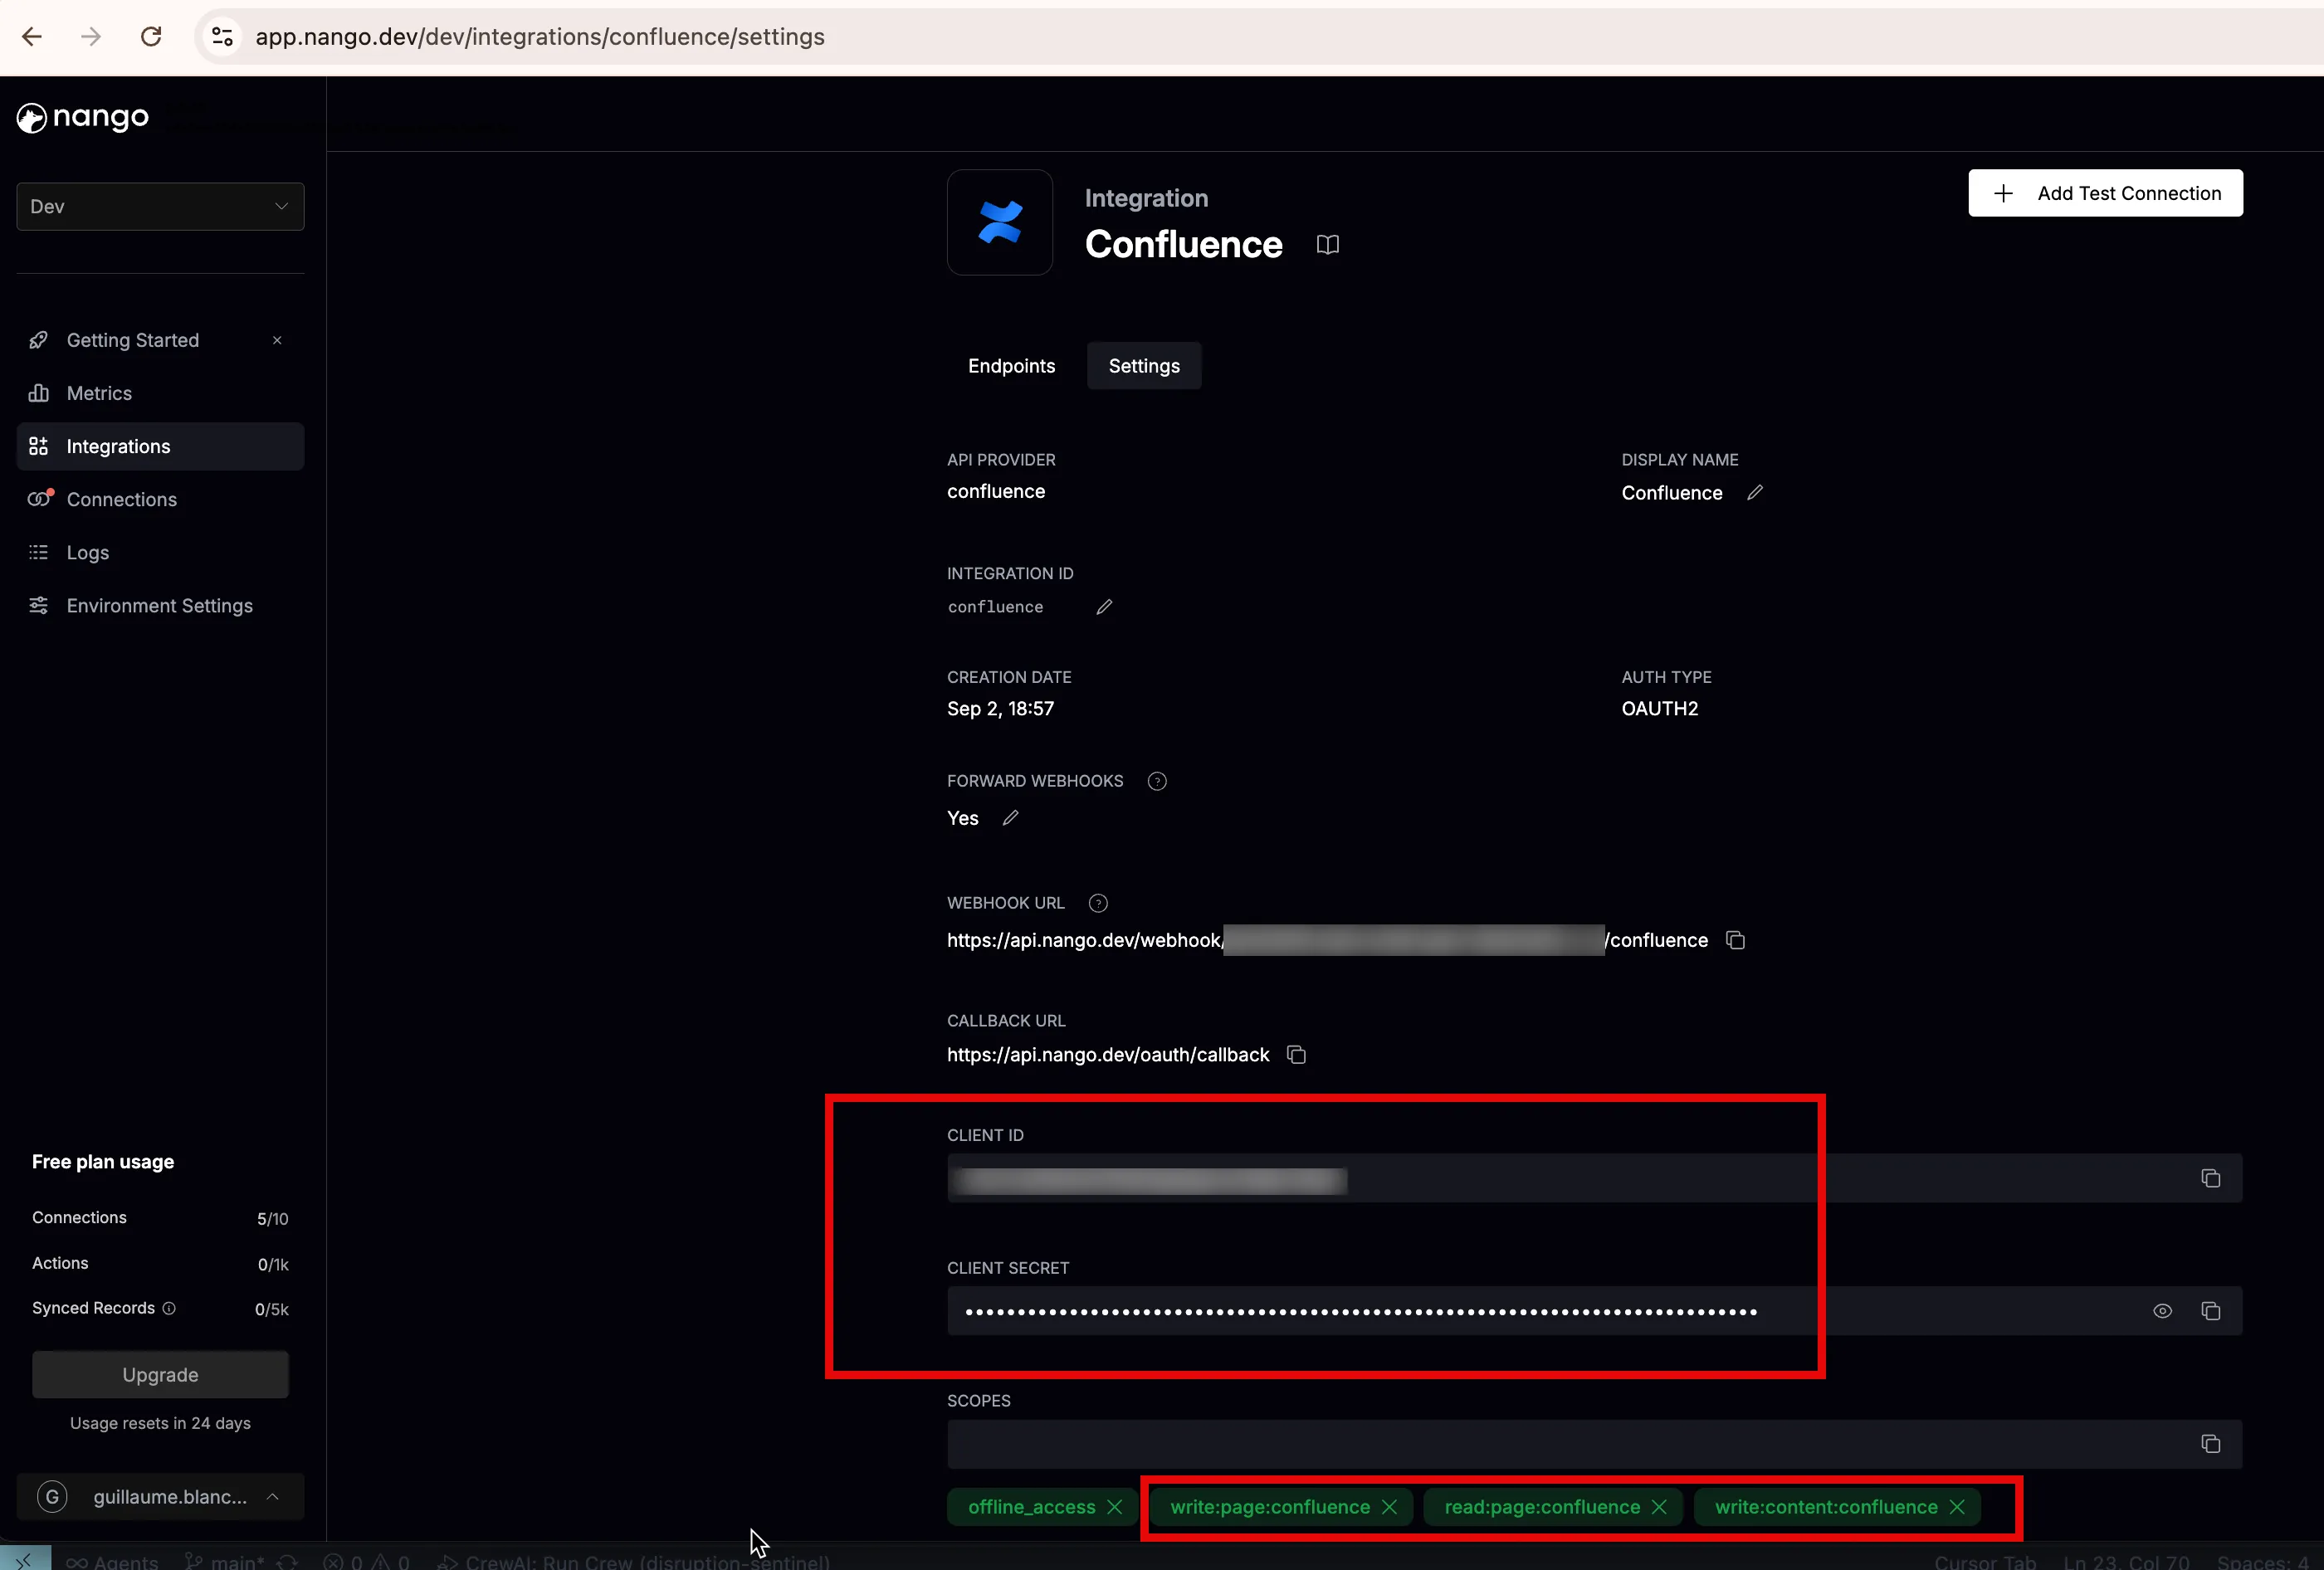
💡 This is also where the callback URL from step 3 comes into play.
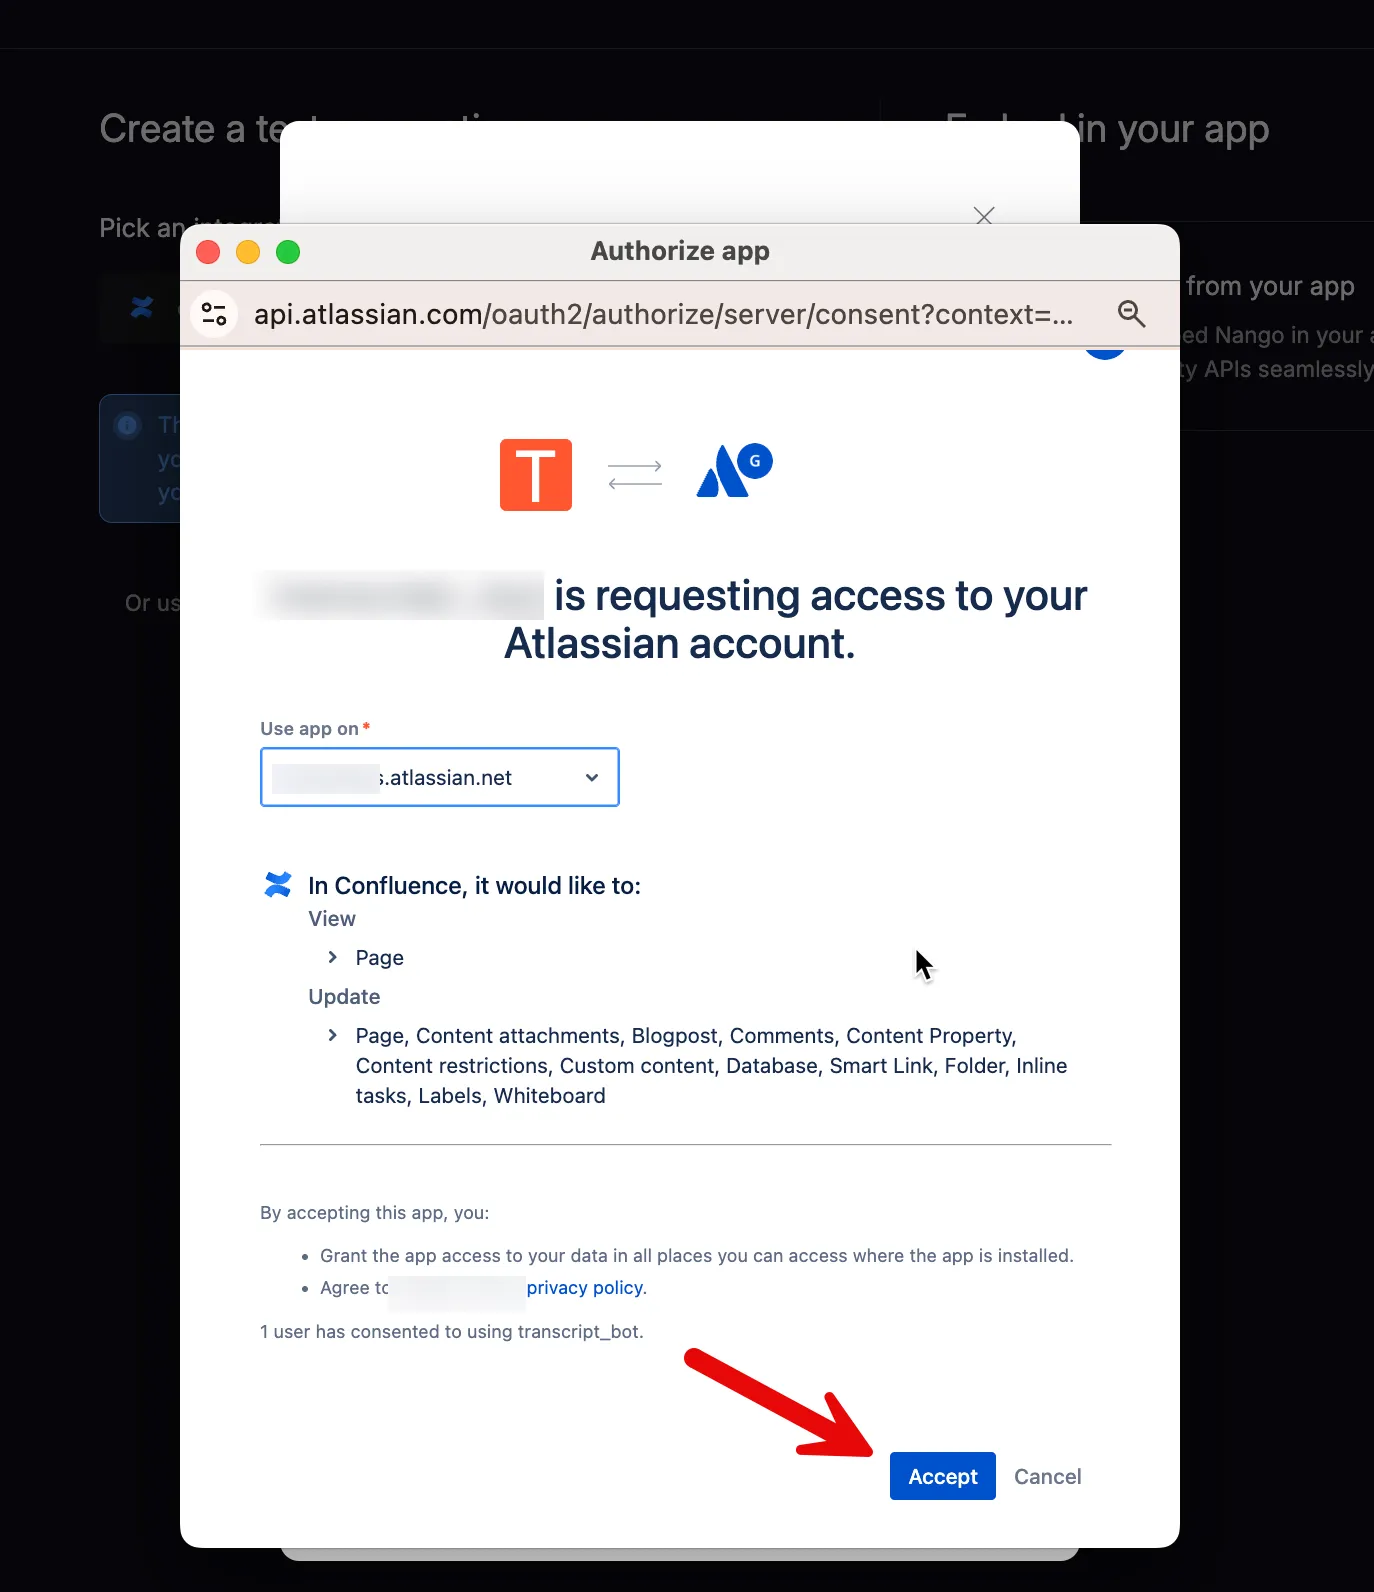
7. Connect a user with the Nango frontend SDK
The frontend SDK can be embedded in your own app, but Nango also provides a built-in test flow.
Click Add Test Connection → Authorize:

Authenticate in the popup:
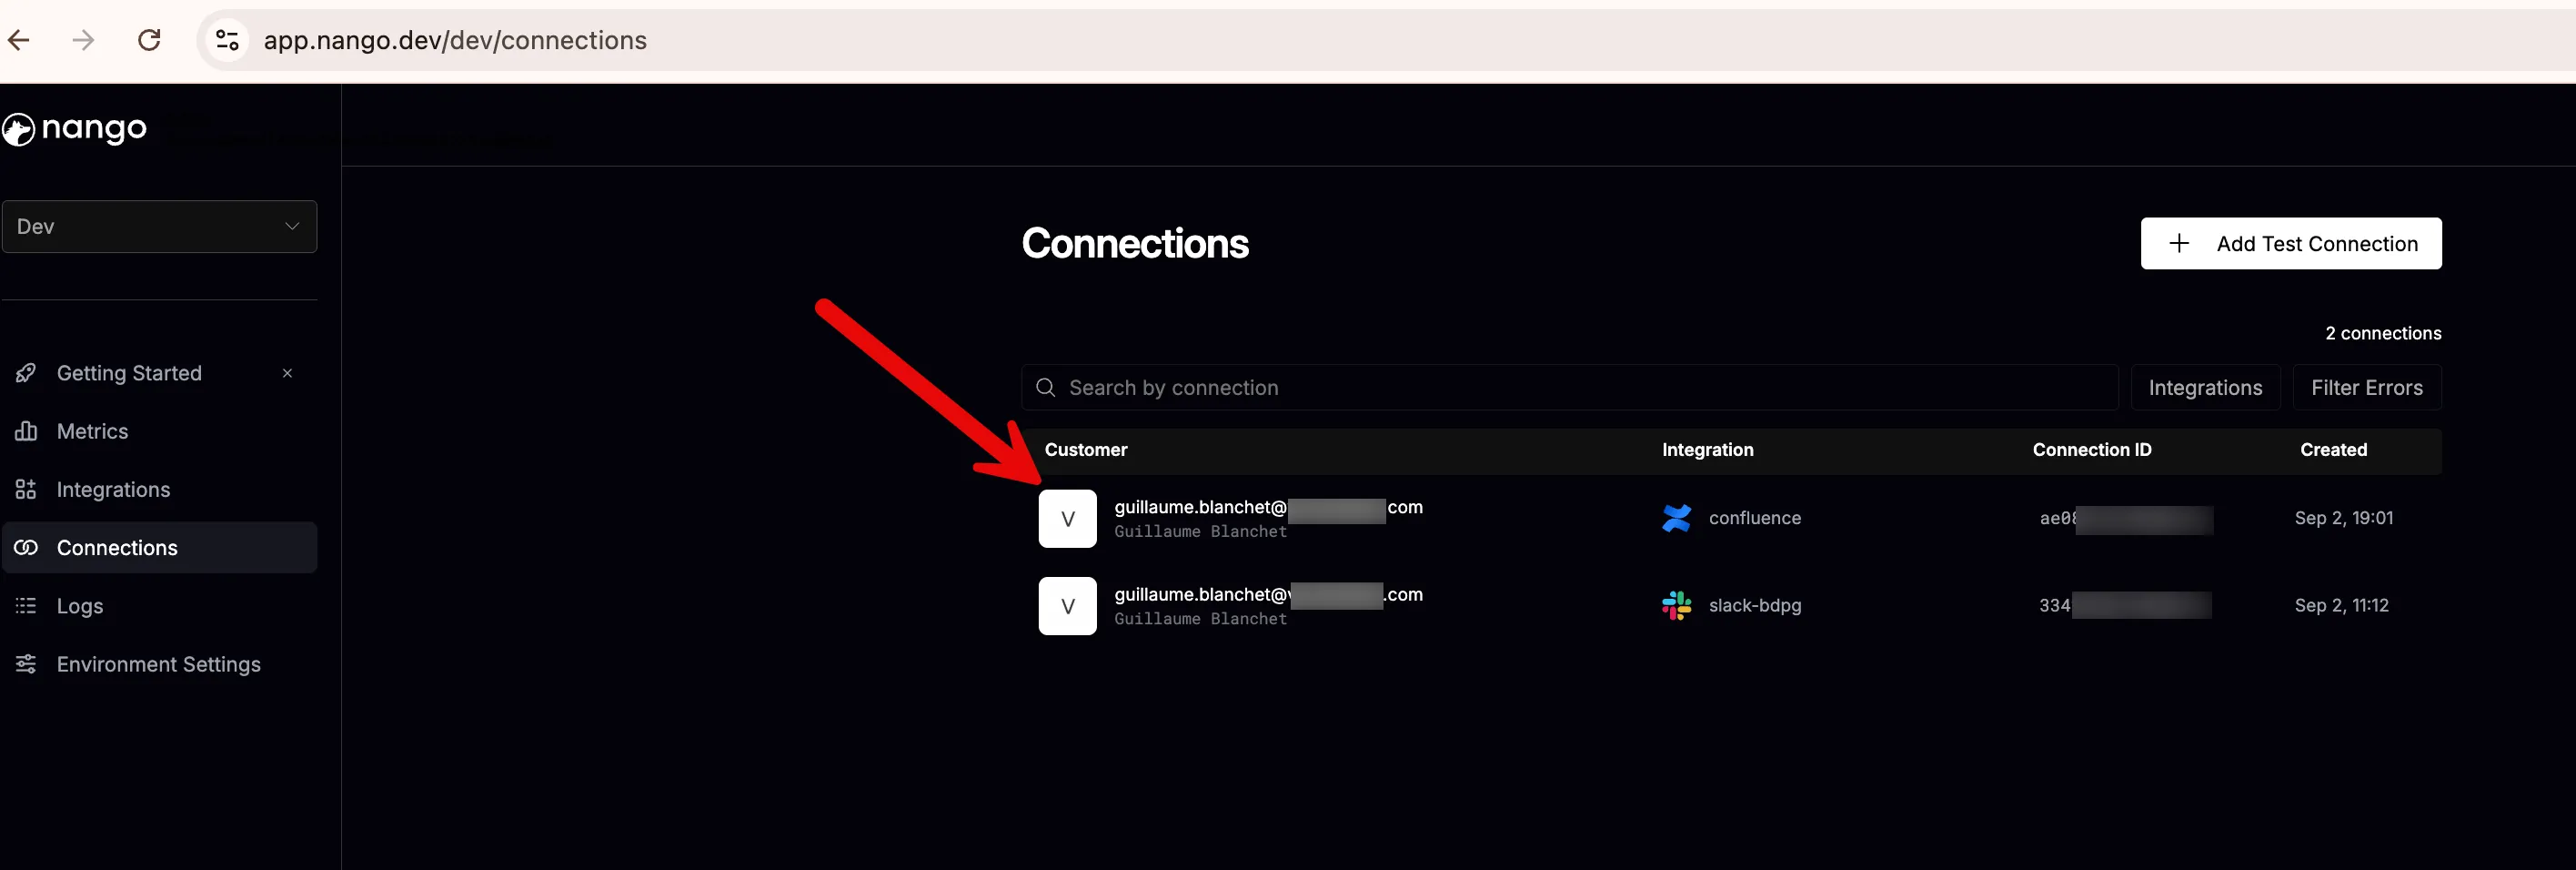
A new connection will be created:
Clicking on the connection reveals the Atlassian token, which Nango refreshes automatically:
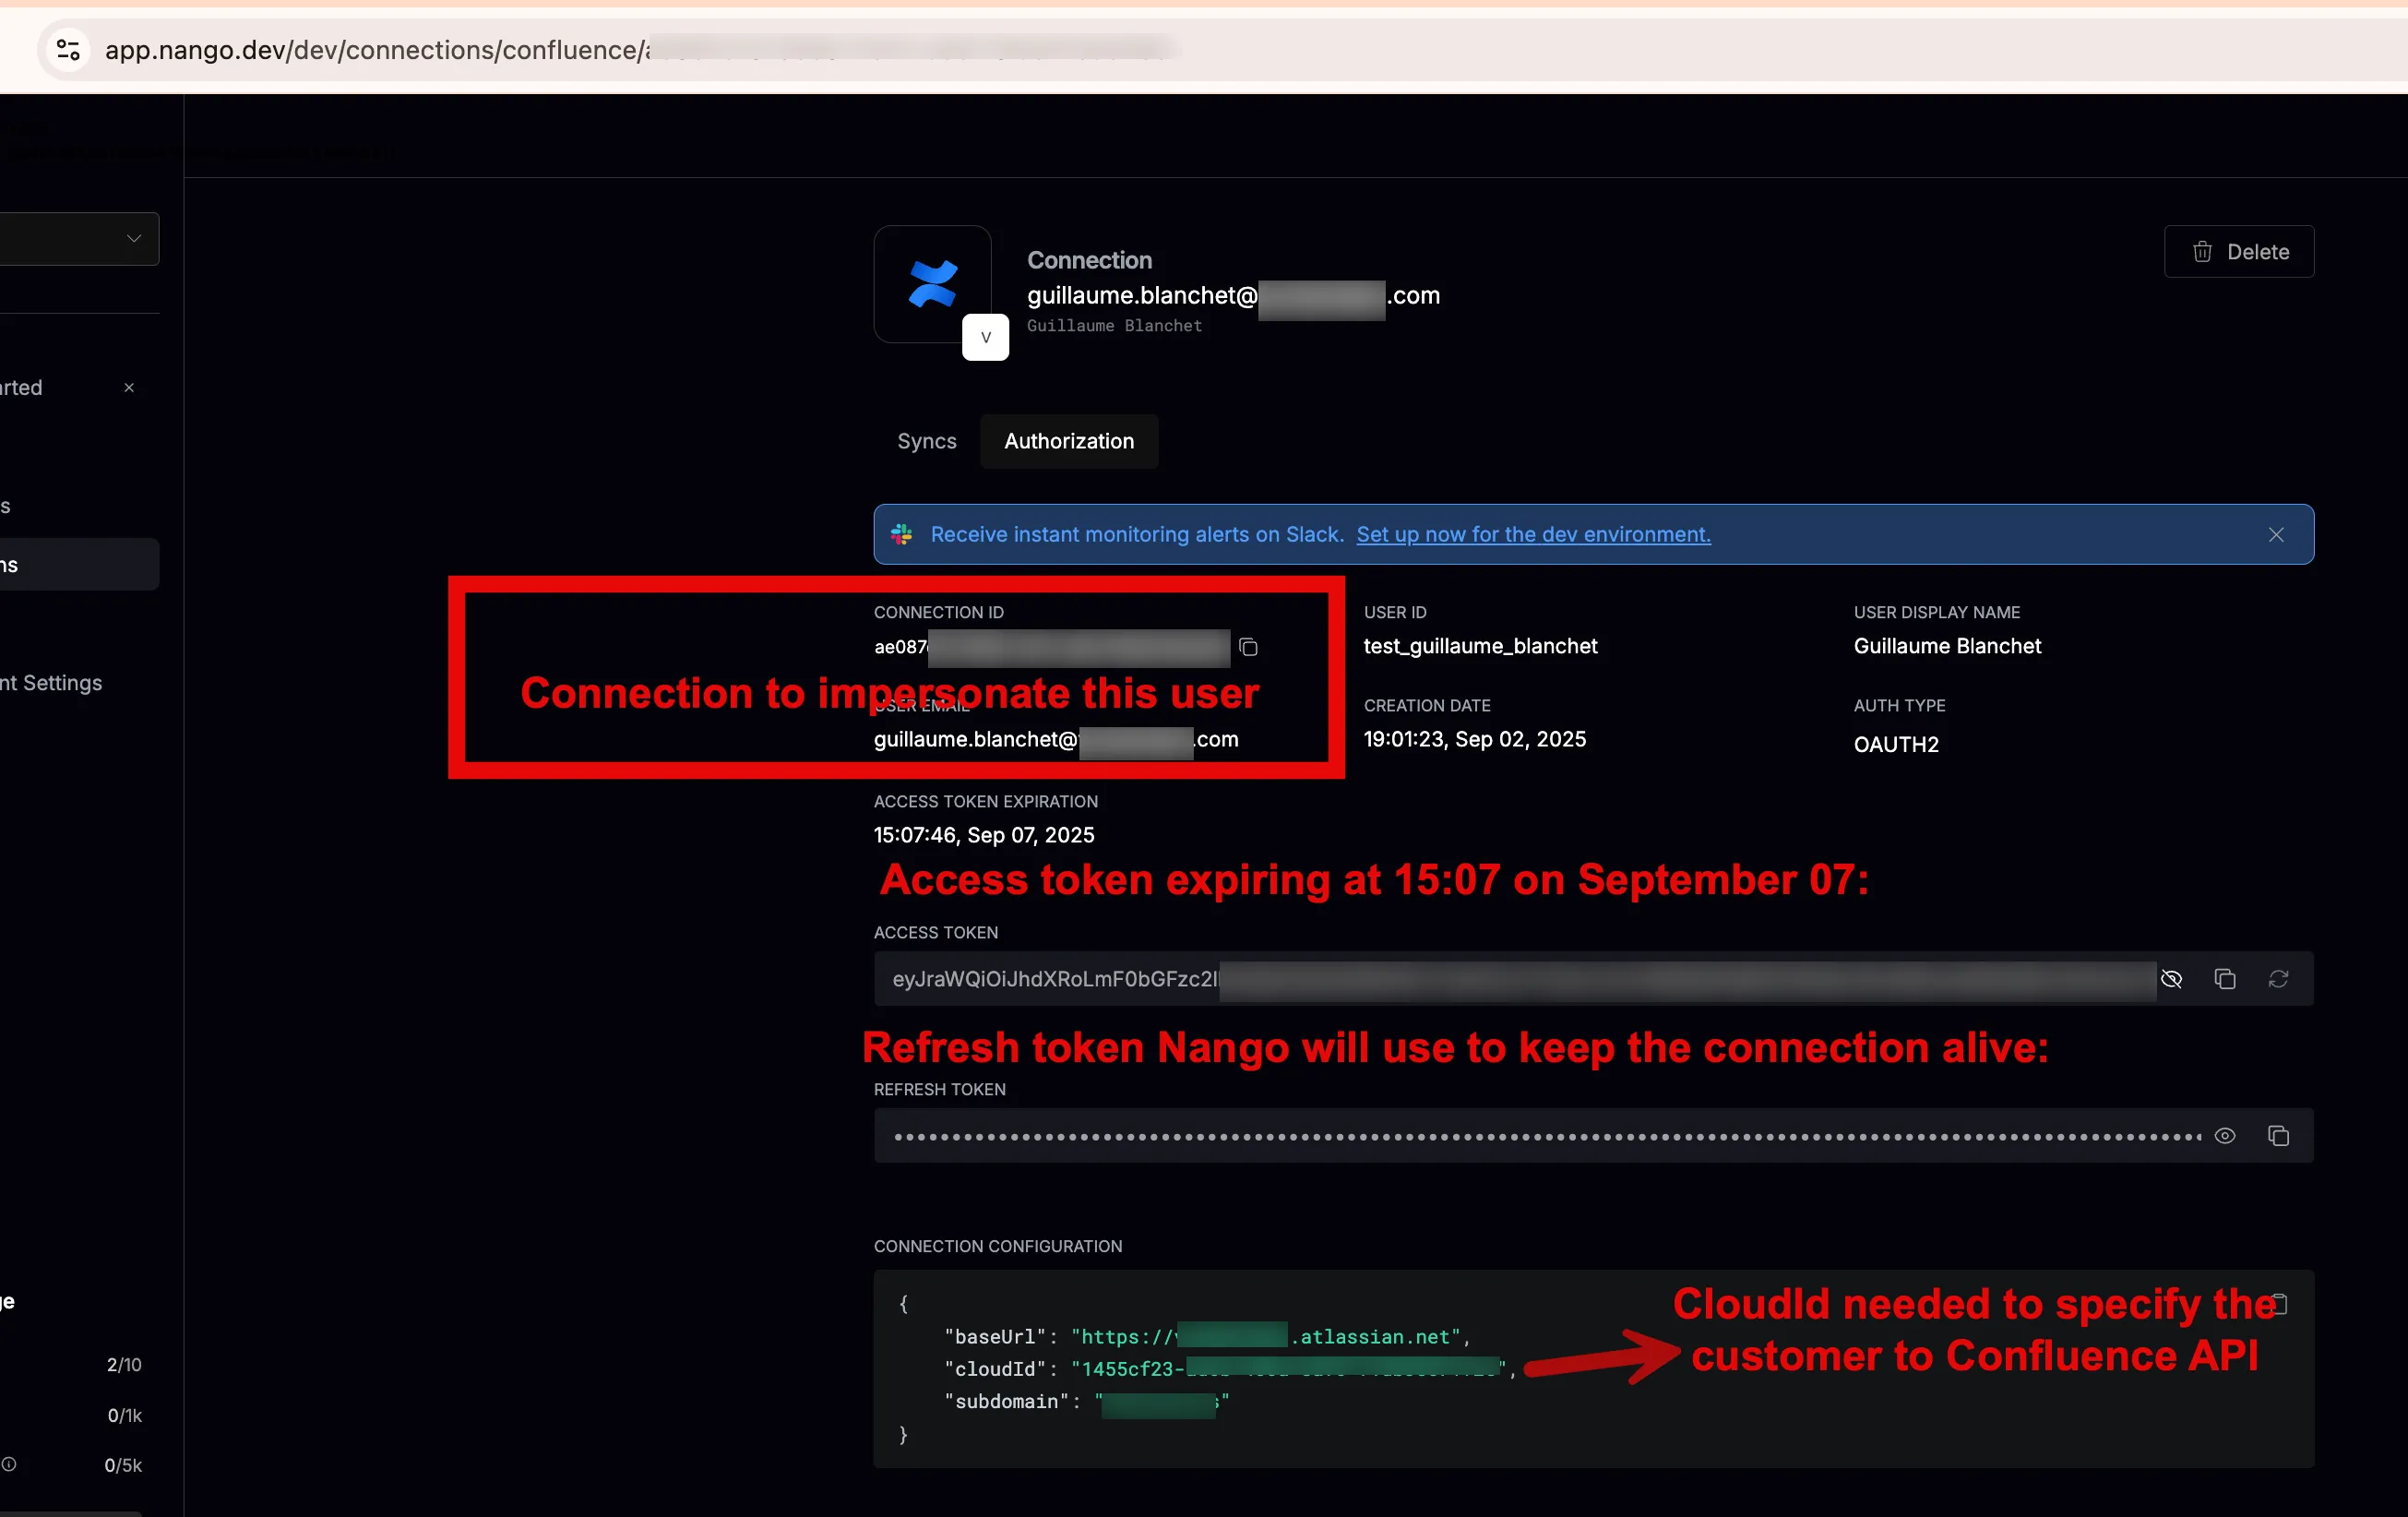
Take note of the Connection ID and Cloud ID for the next step.
8. Test the integration
With the connection details, you can now authenticate an agent (e.g., guillaume.blancet@{domain}.com) to act in Confluence.
You could use the raw access token ($CONFLUENCE_ACCESS_TOKEN) to create a page:
curl -X POST \
"https://api.atlassian.com/ex/confluence/{CLOUD_ID}/wiki/api/v2/pages" \
-H "Authorization: Bearer $CONFLUENCE_ACCESS_TOKEN" \
-H "Accept: application/json" \
-H "Content-Type: application/json" \
-d '{
"spaceId": "{SPACE_ID}",
"title": "Hello World",
"status": "draft",
"body": {
"representation": "storage",
"value": "<p>Page created from Nango</p>"
}
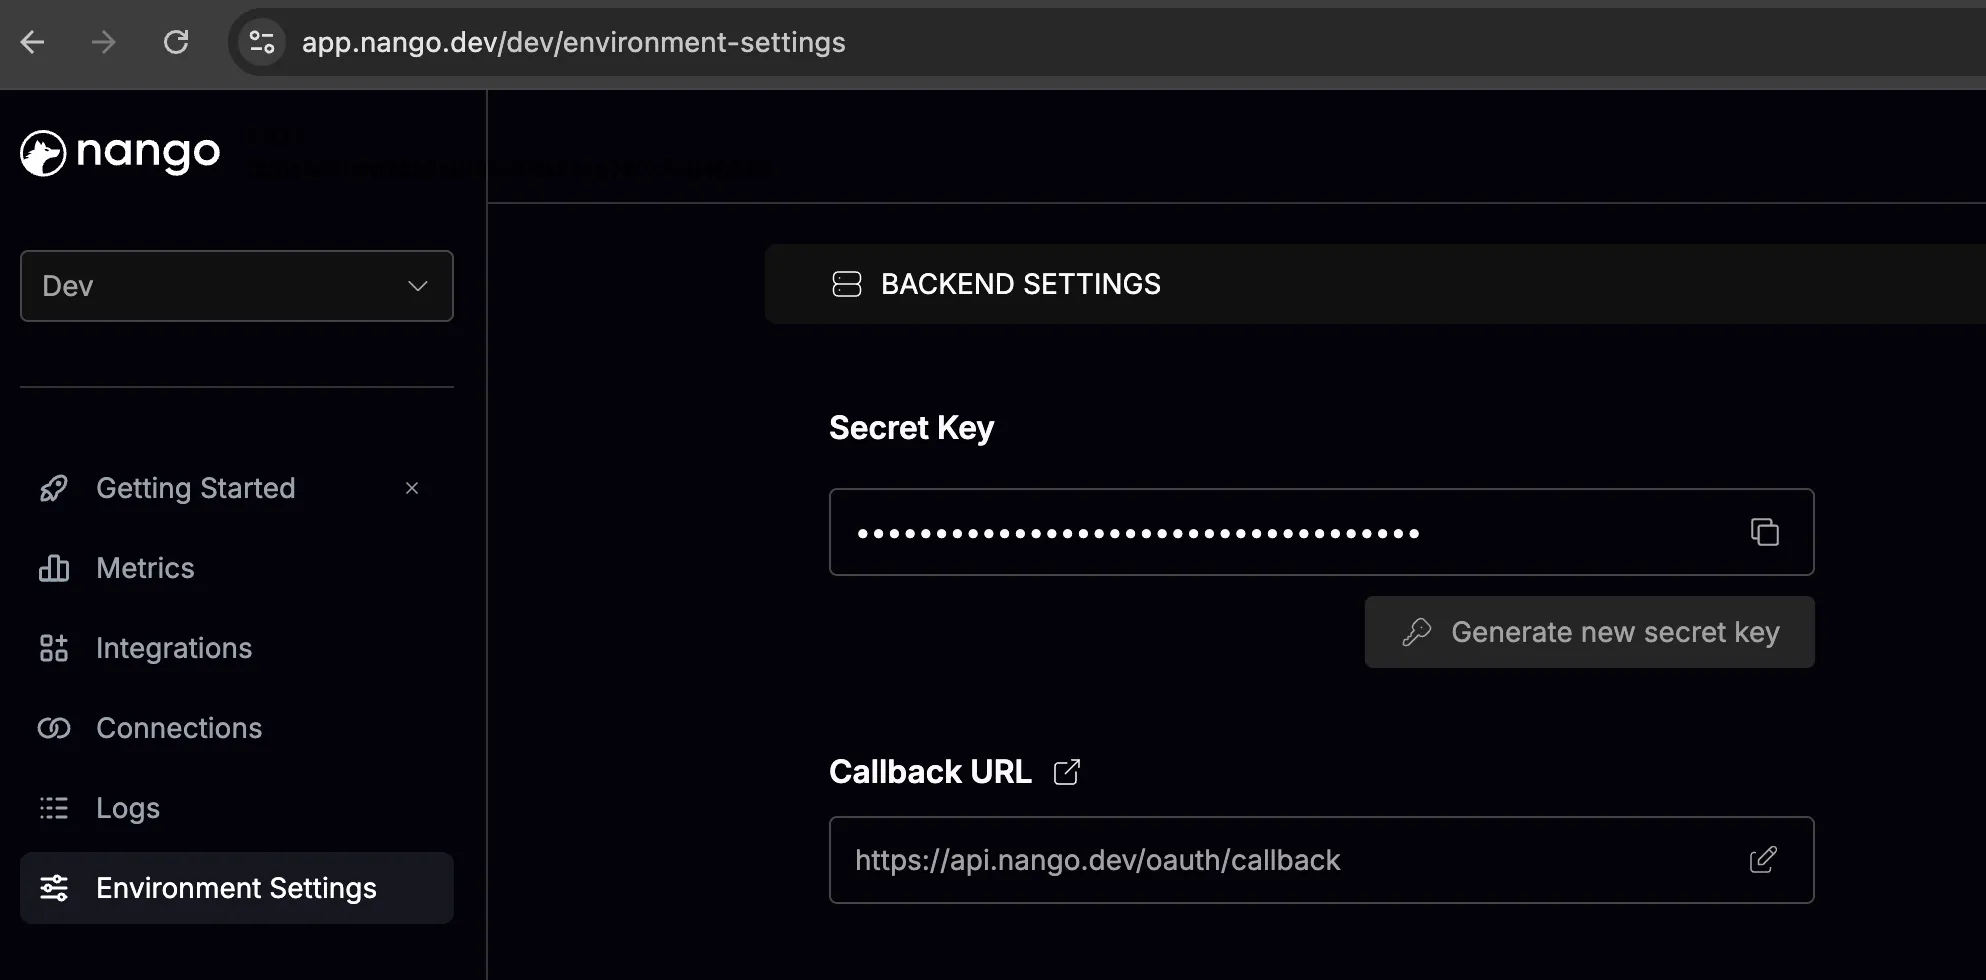
}'But tokens expire quickly. The recommended approach is to use the Nango backend service, which handles refreshes automatically:
curl -X POST -H 'Content-Type: application/json' \
-H 'Authorization: Bearer $NANGO_SECRET' \
-H 'Provider-Config-Key: confluence' \
-H 'Connection-Id: $CONNECTION_ID' \
-d '{
        "spaceId": "{SPACE_ID}",
        "title": "Hello World",
        "status": "draft",
        "body": {
            "representation": "storage",
            "value": "<p>Page created from Nango</p>"
        }
    }' \
'https://api.nango.dev/proxy/ex/confluence/{CLOUD_ID}/wiki/api/v2/pages'
Notice the endpoint is the same, but Nango standardizes authentication across all providers using:
$NANGO_SECRET(from your Nango environment settings)$CONNECTION_ID- Provider integration name
This gives you a consistent way to query any provider.
Conclusion
Confluence is just one example—Nango supports 400+ integrations. With Nango, you don’t need to worry about each provider’s authentication mechanism. Instead, you get:
- A unified credential store for all your agents
- Consistent authorization flows across providers
- Automatic token refreshes
This makes it far easier to build autonomous agents that can perform real tasks without human intervention.