Your Legacy System Isn't a Liability, It's a Goldmine: Unlock It with Salesforce
How to synchronize Salesforce data to your system

Synchronize Salesforce Data to Your System
Introduction
Salesforce is one of the most powerful CRM systems on the market. This “low-code” platform can replace an entire IT department by offering a website to manage your clients, billing, marketing campaigns, field interventions, and much more.
Even though it can manage your entire back office, it can’t replace your brand image or certain systems at the core of your business model. Integrating Salesforce data is therefore fundamental to presenting your customers with custom products while transferring their data to the CRM to ensure consistency across your systems.
Install the Salesforce CLI (“sf”)
The first step to working efficiently with Salesforce data is installing “sf”.
This command-line tool allows you to quickly test your queries to the CRM. For example:
sf org login web
sf org list
sf data query --query "SELECT Id, Name, Account.Name FROM Contact" -o <ORG_USERNAME>
These three commands let you connect to your Salesforce instance, view details of your organization, and finally use those details to execute a query. Here’s what it looks like on a developer test instance:
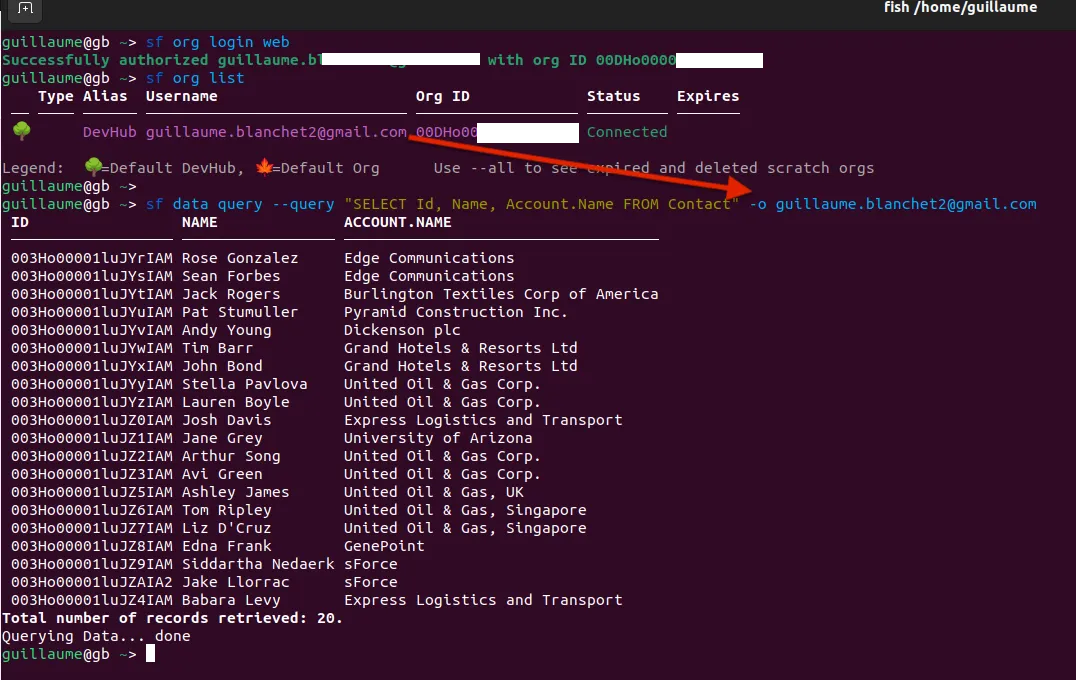
As you can see, Salesforce does you a favor by creating the instance with prepopulated data.
Programmatic Synchronization Using Salesforce’s REST API
Once you have tested the queries you want to use in your synchronization program with sf, all that’s left is to write the code that will execute these queries to perform the synchronization.
Of course, contacting the REST API directly would require you to recode the data transfer objects (DTOs), which we want to avoid. Salesforce provides an excellent Node.js wrapper (jsforce) for its API, and it’s the one I recommend for several reasons:
- Salesforce recommends this ecosystem;
sfwas coded with Node.js;- It’s one of only two wrappers recommended by the system’s documentation;
- jsforce is maintained by Salesforce, unlike other wrappers in other major programming languages (for example: https://github.com/simple-salesforce/simple-salesforce);
- The documentation is superior to other wrappers, as there is a website dedicated to jsforce documentation.
Example of Data Retrieval with Jsforce
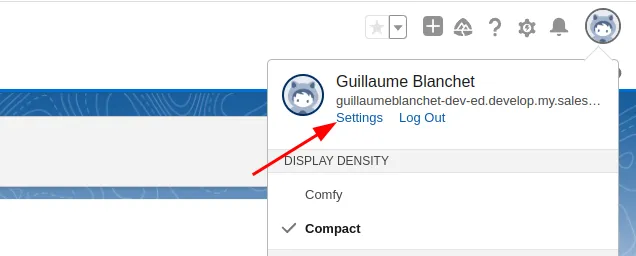
Jsforce will need a “security token” in addition to your password to connect to your Salesforce instance. Navigate to “Setup”:
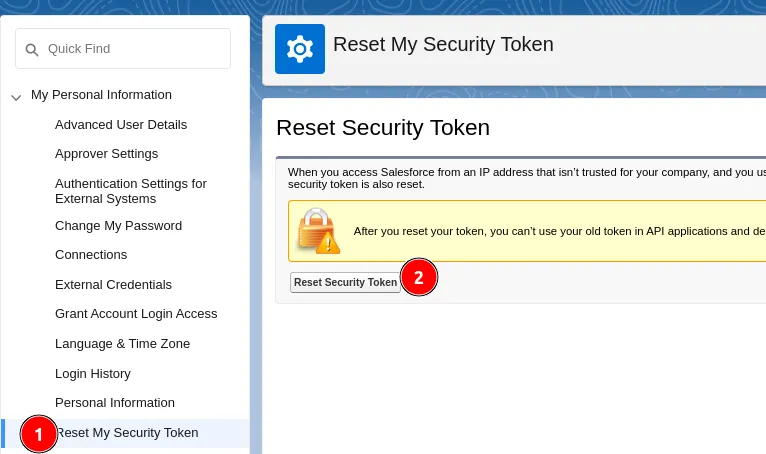
Then create a security token for yourself:
Here is an example code snippet that retrieves contacts from the Salesforce database:
var jsforce = require('jsforce');
var username = '<email>';
var securityToken = '<security-token>';
var password = '<password>';
var conn = new jsforce.Connection({
  loginUrl : 'https://guillaumeblanchet-dev-ed.develop.my.salesforce.com'
});
conn.login(username, password + securityToken, function(err, res) {
  conn.query('SELECT Id, Name FROM Account', function(err, res) {
    console.log(res);
  });
});
You should see something like this in your console:
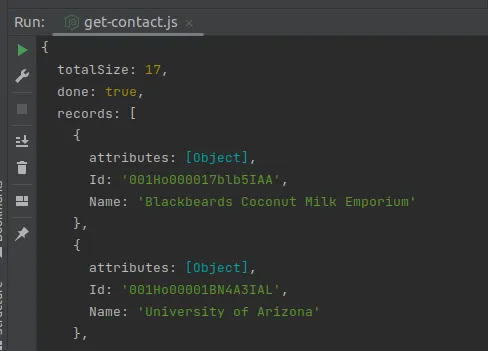
As you can see, the API returns information to help you paginate requests. Since we are using a top-tier wrapper, Jsforce can manage pagination itself with the record event.
Example of Firebase <-> Salesforce Synchronization
Here is a more complete example that first deletes the synchronized table in the target system (here, a Firebase database) and then inserts the Salesforce entries one by one:
conn.login(username, password + securityToken, (err, res) => {
  // clear your synchronized database account table (example with firebase)
  firebase.database().ref('account').remove();
  var query = conn.query('SELECT Id, Name FROM Account')
    .on('record', record => {
      console.log(record);
      // insert record into your database (example with firebase)
      firebase.database().ref('account').push(record);
    })
    .on('end', () => {
      console.log("total in database : " + query.totalSize);
      console.log("total fetched : " + query.totalFetched);
    })
    .run({ autoFetch : true });
});
I’ve deliberately omitted initializing the Firebase connection to focus on the relevant code. However, you can consult the documentation for Node.js here: https://firebase.google.com/docs/reference/node.
Note the autoFetch functionality, which allows for automatic query pagination and demonstrates the utility of choosing your wrapper well before integrating with Salesforce (or any other system).
Executing Periodic Synchronization
Of course, you could place the small script above into an Azure Function, an AWS Lambda, or even a cloud function directly in Firebase to execute it at regular intervals.
Personally, I prefer using a DevOps job. The idea is to continue benefiting from powerful platforms that do more for us. This is the case for DevOps platforms like Azure DevOps, GitLab, or GitHub Actions. These platforms do not limit you in the number of programming languages supported. They offer a wide range of operating systems to run your code. They have extremely mature and central interfaces for their core business. They are truly the best cloud orchestrators on the market, even though they are better known for performing compilation and deployment tasks.
For example, here is a GitHub Action job that synchronizes your data at midnight every day (see the documentation for all supported schedule types: GitHub Docs):
name: Node.js CI
on:
schedule:
- cron: '0 0 * * *' # Run every day at midnight UTC
jobs:
build:
runs-on: ubuntu-latest
defaults:
run:
working-directory: ./Salesforce
strategy:
matrix:
node-version: [14.x, 16.x, 18.x]
# See supported Node.js release schedule at https://nodejs.org/en/about/releases/
steps:
- uses: actions/checkout@v3
- name: Use Node.js ${{ matrix.node-version }}
uses: actions/setup-node@v3
with:
node-version: ${{ matrix.node-version }}
cache: 'npm'
cache-dependency-path: ./Salesforce/package-lock.json
- run: npm ci
- shell: bash
env:
SF_PWD: ${{ secrets.SF_PWD }}
SF_SECURITY_TOKEN: ${{ secrets.SF_SECURITY_TOKEN }}
TEST: 'it works!!'
run: |
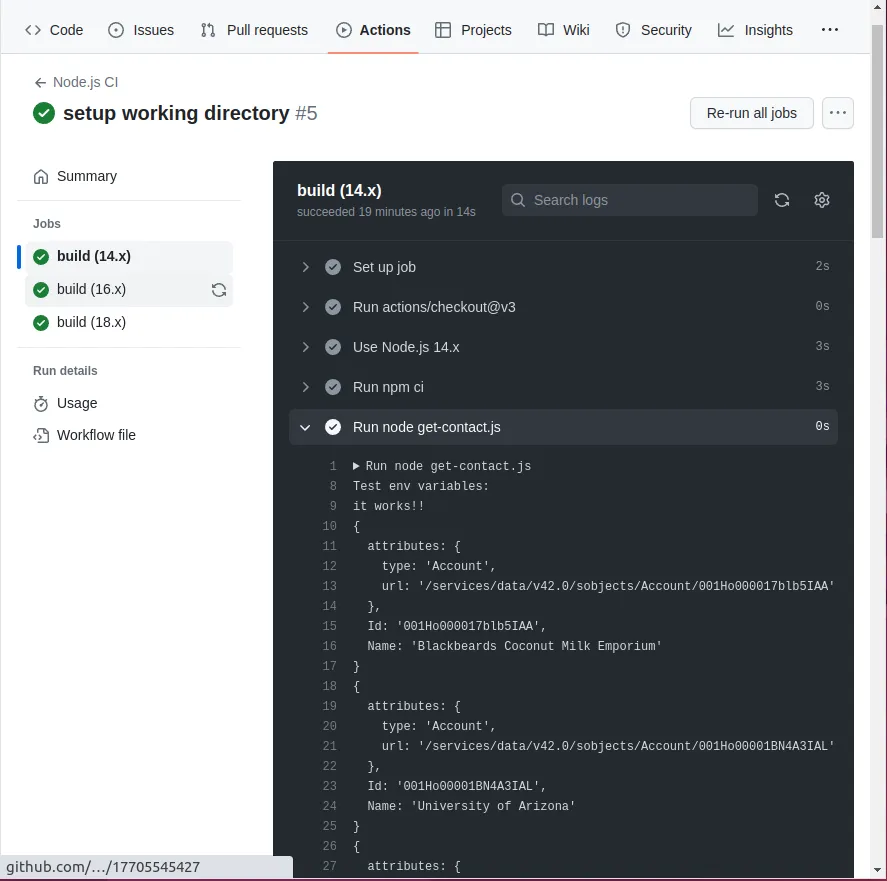
node get-contact.jsGitHub provides access to all synchronization logs made at midnight, and you have the ability to retrigger failed jobs and manage them:
DevOps platforms also provide you with OpenID Connect (OIDC) integrations to avoid managing secrets (here, your password and the security token), which cloud functions do not offer.
DevOps platforms will also help you identify synchronization issues by associating new failed jobs with the recently committed faulty code. GitHub will even soon offer intelligent assistants (bots) to support you in this debugging.
You can also manage access and permissions for pipelines very precisely.
Conclusion
You now have the tools to synchronize your Salesforce data with your system:
- You have learned to use the Salesforce CLI to test your queries;
- You have learned to use the Jsforce wrapper to program your synchronization;
- You have learned to use DevOps platforms to orchestrate your synchronization.
If the load becomes too high during your synchronizations, you can revert to custom pagination to load data batches into your database with a “bulk insert” strategy. For Firebase, it could look like this:
firebase.database().ref('account').set(records);This is equivalent to replacing the entire contact data table at once for an initial batch of records as a parameter.
Note that we have only discussed synchronization towards your system and not towards Salesforce. If you want to push new data to Salesforce, you can use the same wrapper, because Jsforce offers a “bulk insert” feature to efficiently push multiple entries for large systems: Jsforce Documentation.