Build a SwiftUI Chatbot with ExyteChat and OpenAI (MacPaw)
Step‑by‑step guide to create a modern iOS chatbot UI and connect it to OpenAI using Swift Package Manager.
Introduction
This tutorial shows how to build a clean SwiftUI chatbot UI and hook it up to OpenAI using the MacPaw SDK, following the reference project here: GitHub – GuillaumeBlanchet/chatbot (give a github star if you like it, it will be truly appreciated).
I did this tutorial because the other ones I found were not up to date or they were not leveraging the existing mainstream libraries like ExyteChat and MacPaw OpenAI.
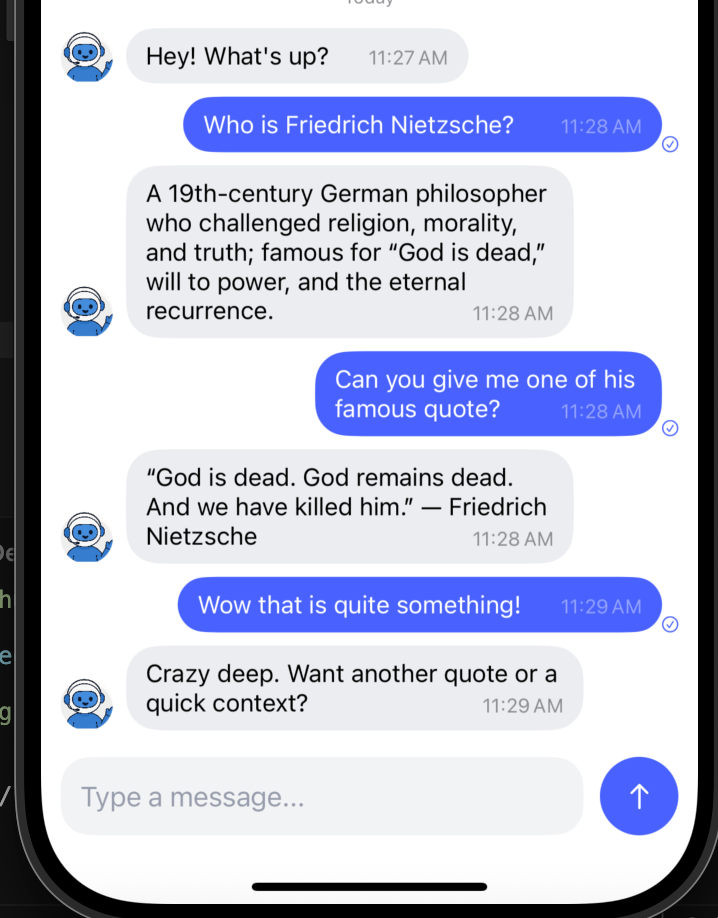
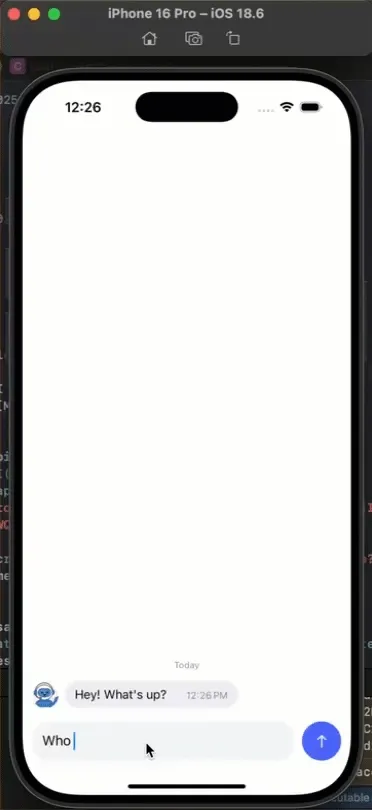
Here’s a quick demo clip of the project once it’s done:
What you’ll do:
- Create an iOS app in Xcode
- Add dependencies via Swift Package Manager
- Wire up a simple
ChatViewModelto call OpenAI - Display messages using Exyte’s Chat UI
Requirements: Xcode 14+, iOS 15+, and an OpenAI API key.
1) Create the Xcode project
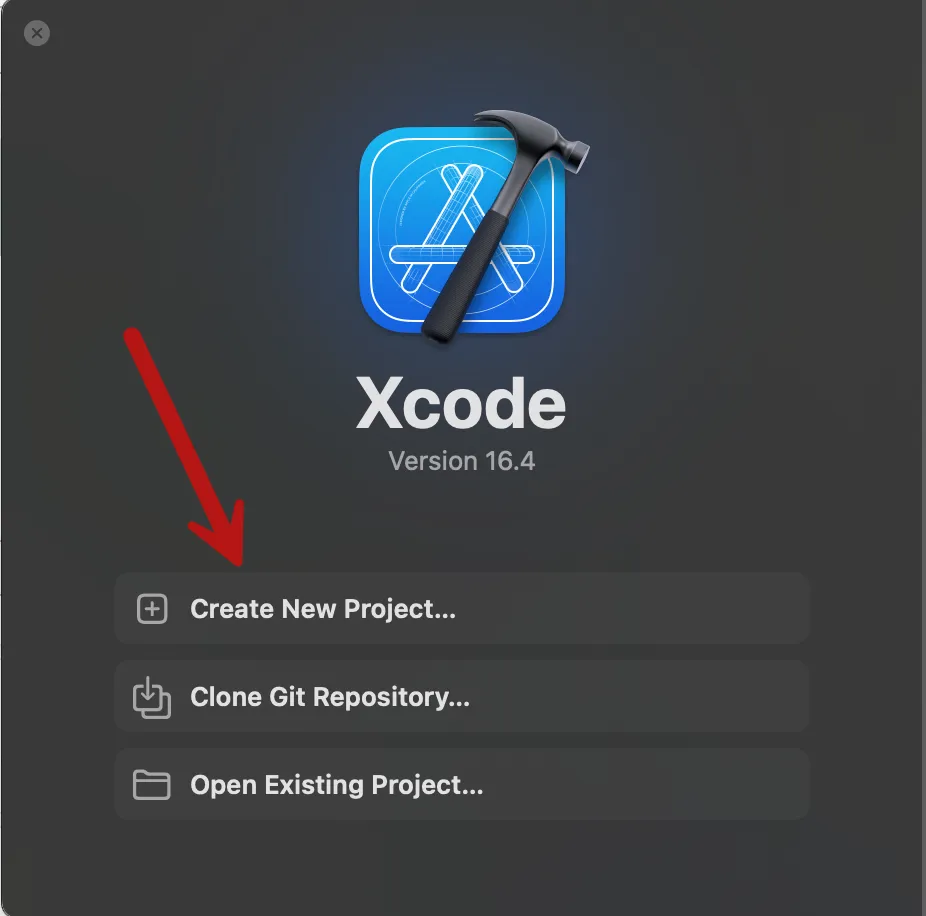
Open Xcode and start a new project:
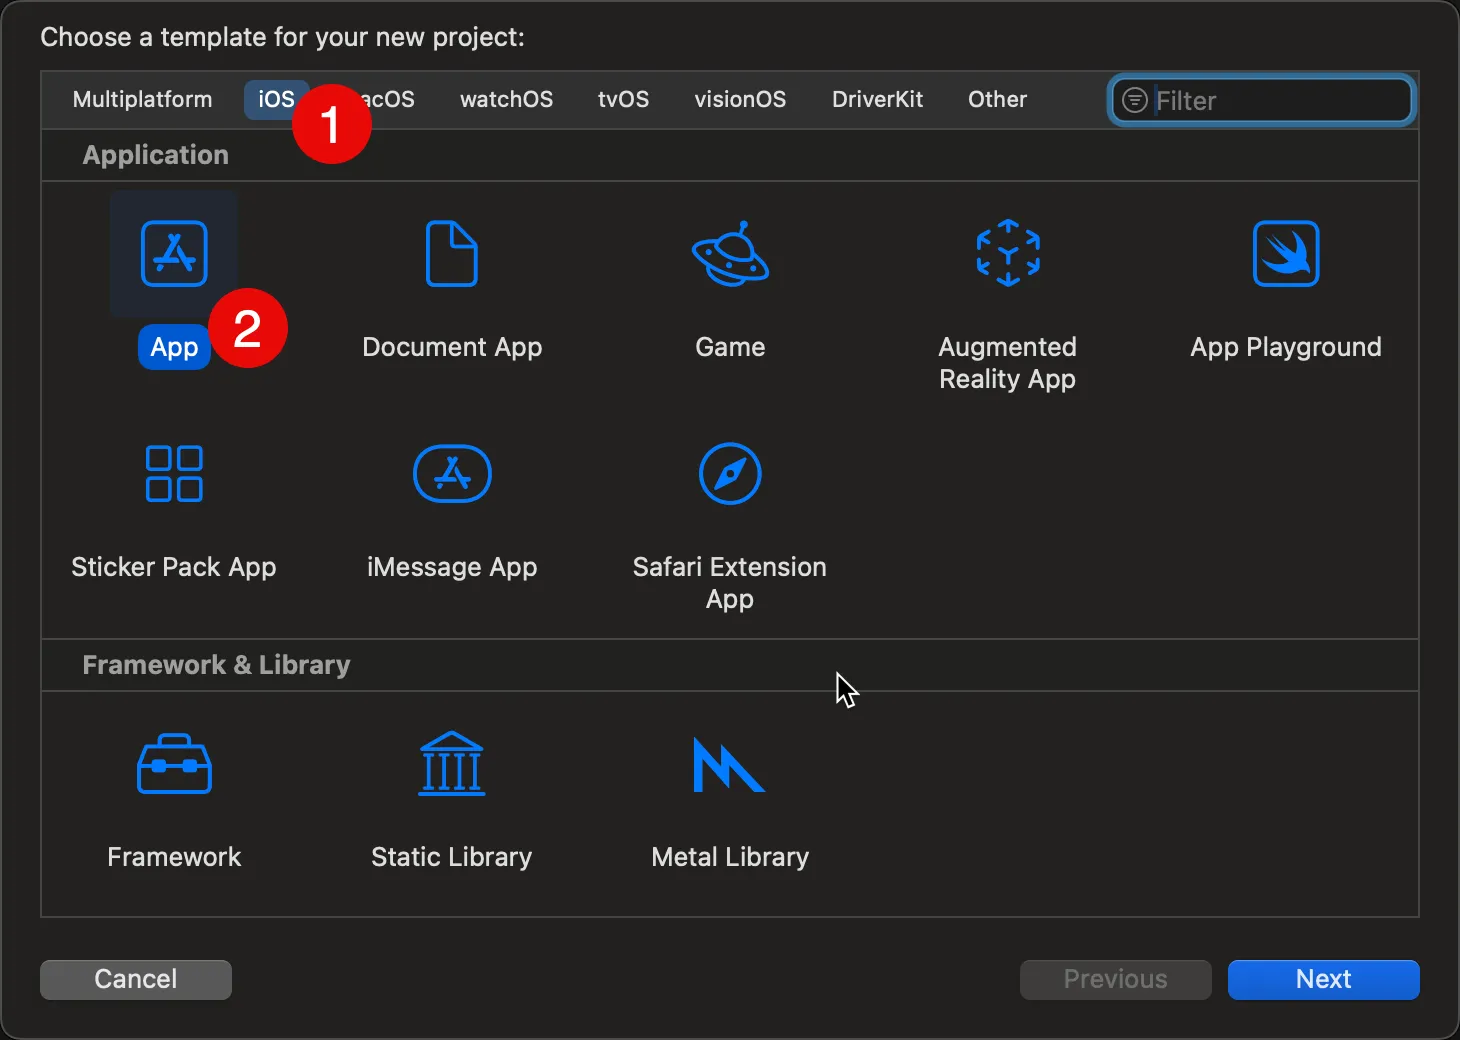
Choose iOS > App:
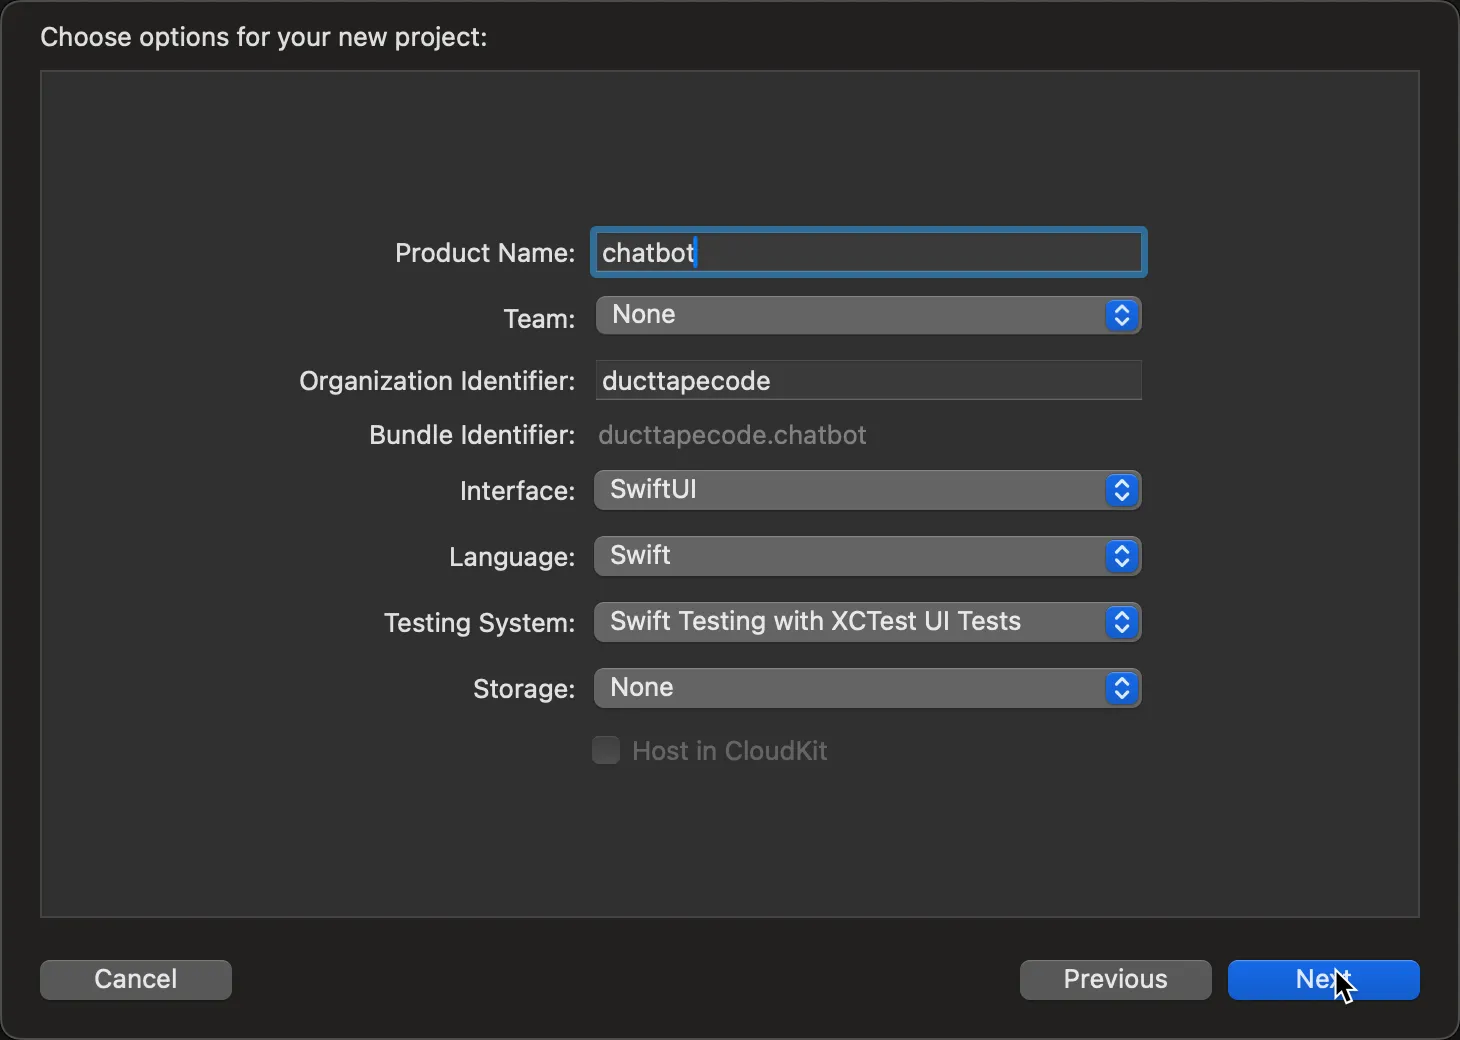
Enter a product name (e.g., “chatbot”) and ensure Interface is SwiftUI:
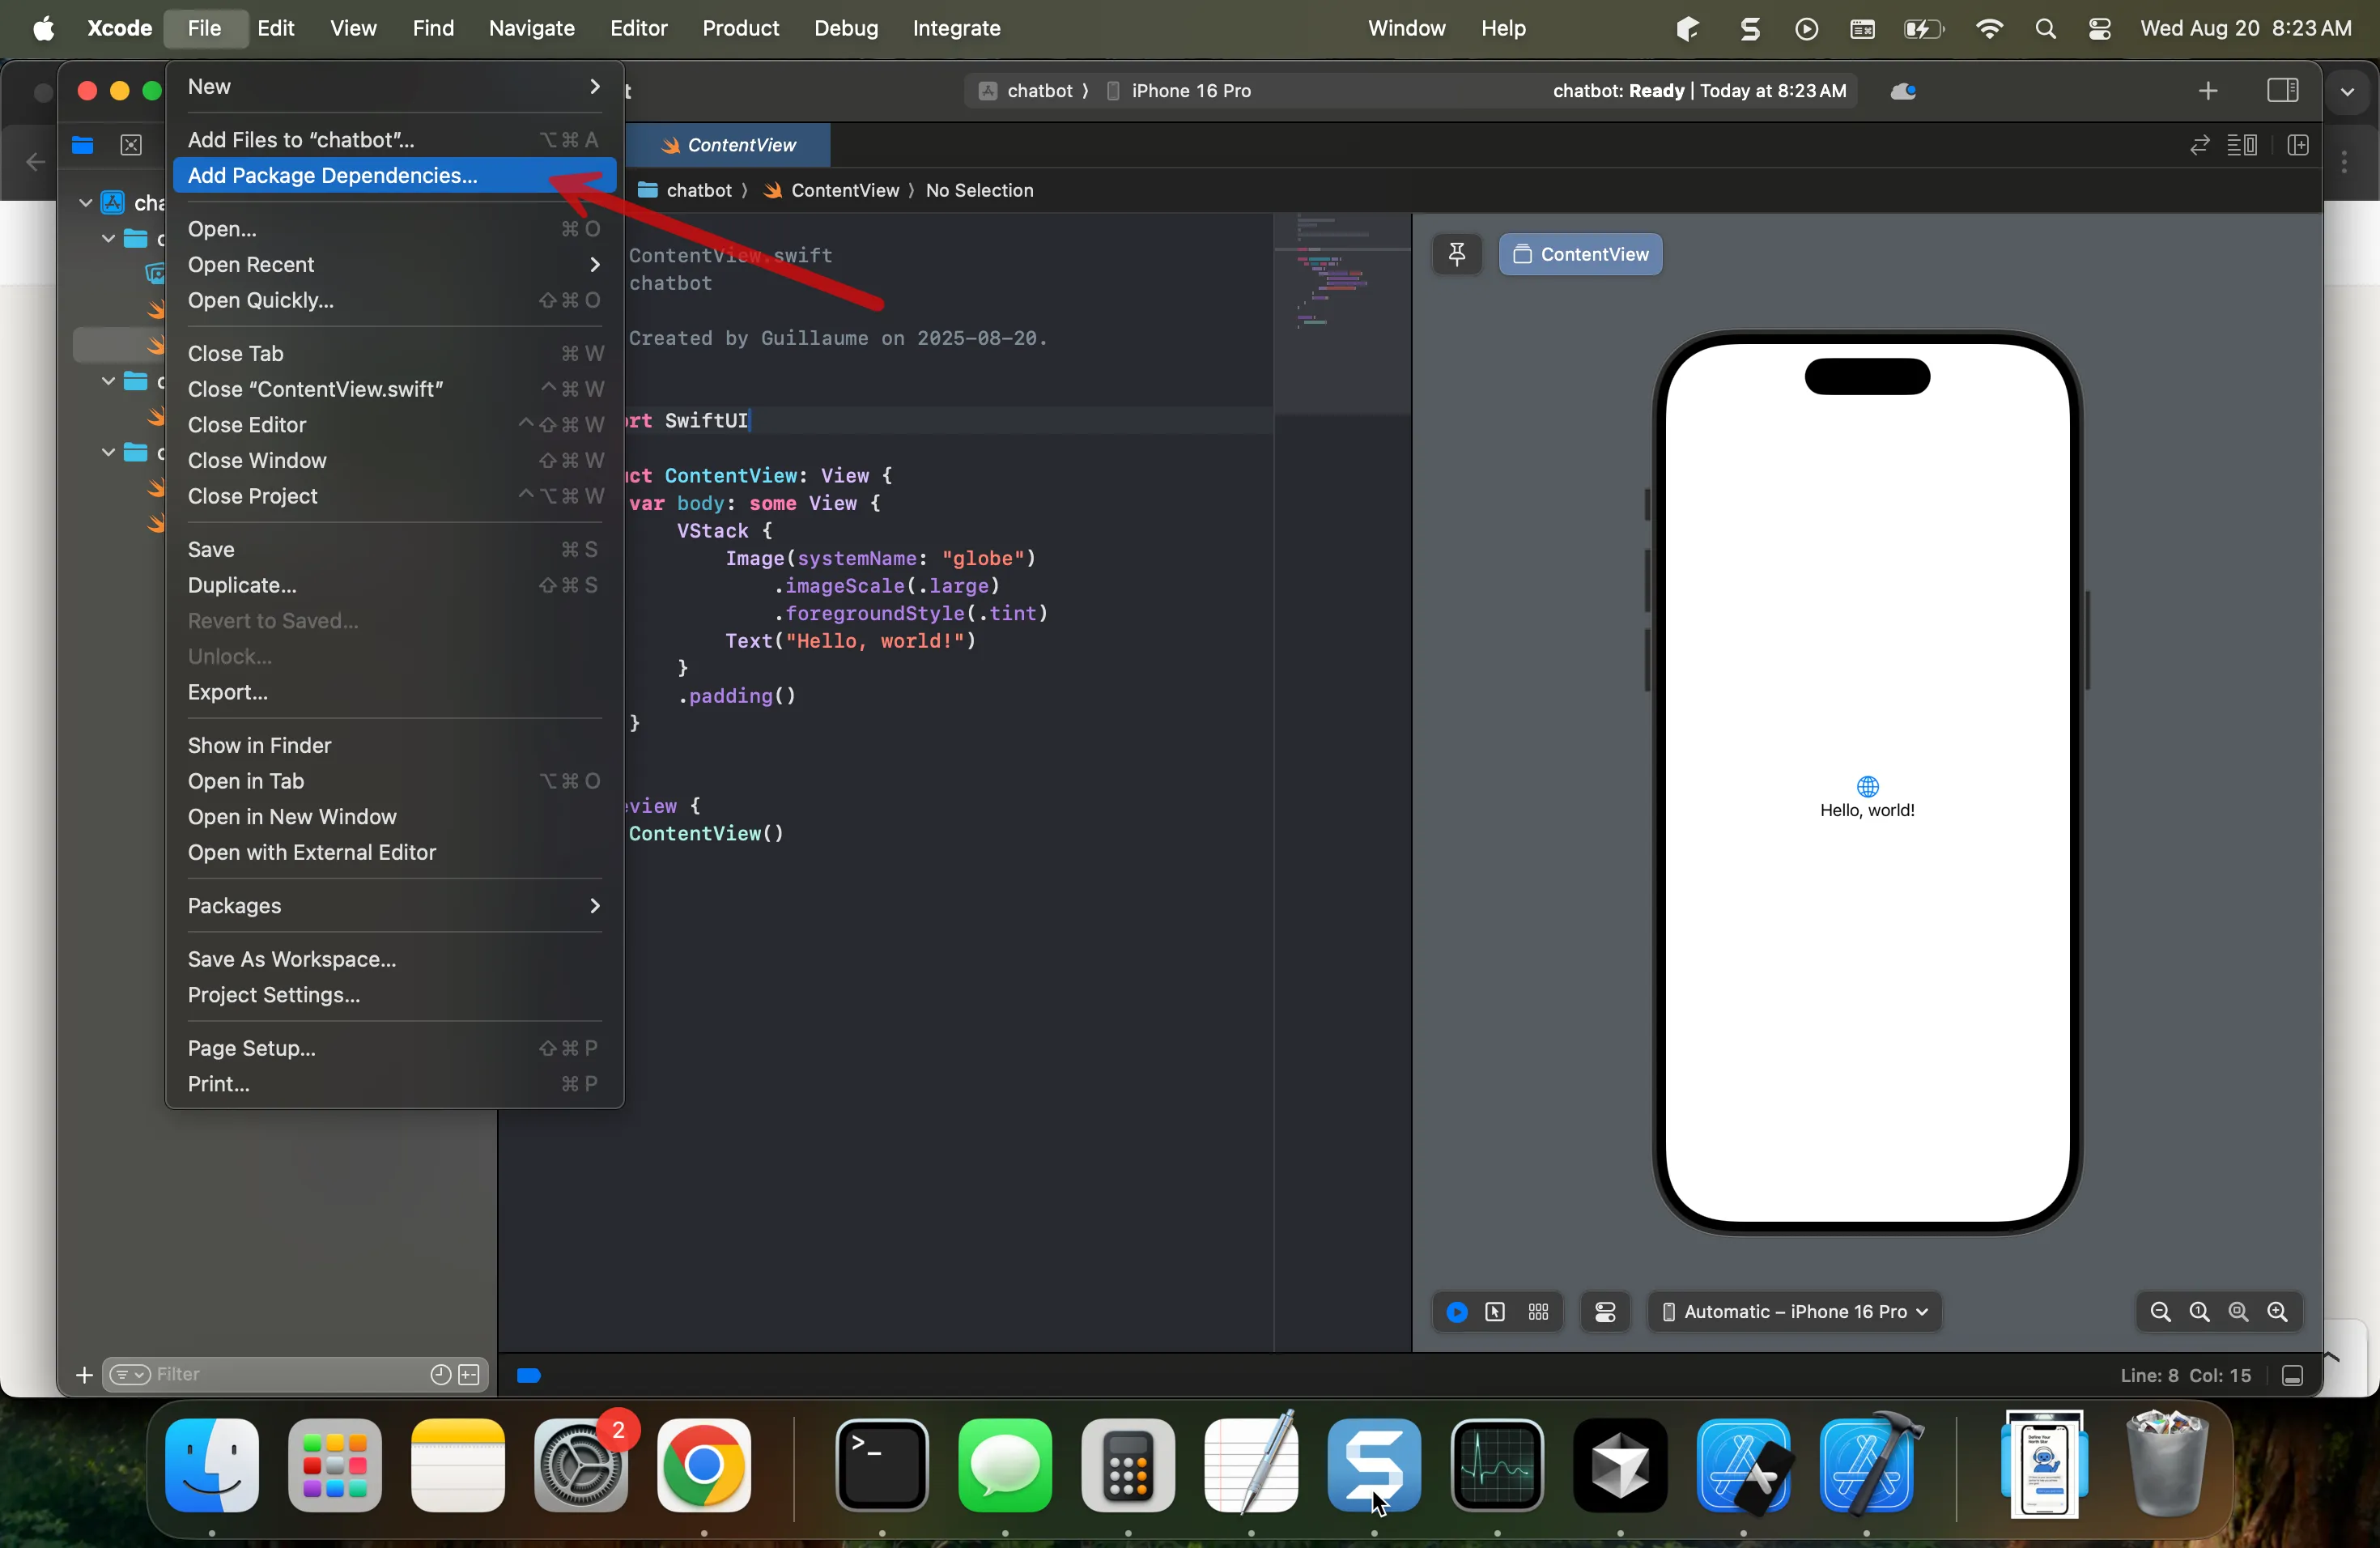
2) Add dependencies (Swift Package Manager)
Add the following packages:
- Exyte Chat UI (ExyteChat)
- OpenAI (MacPaw)
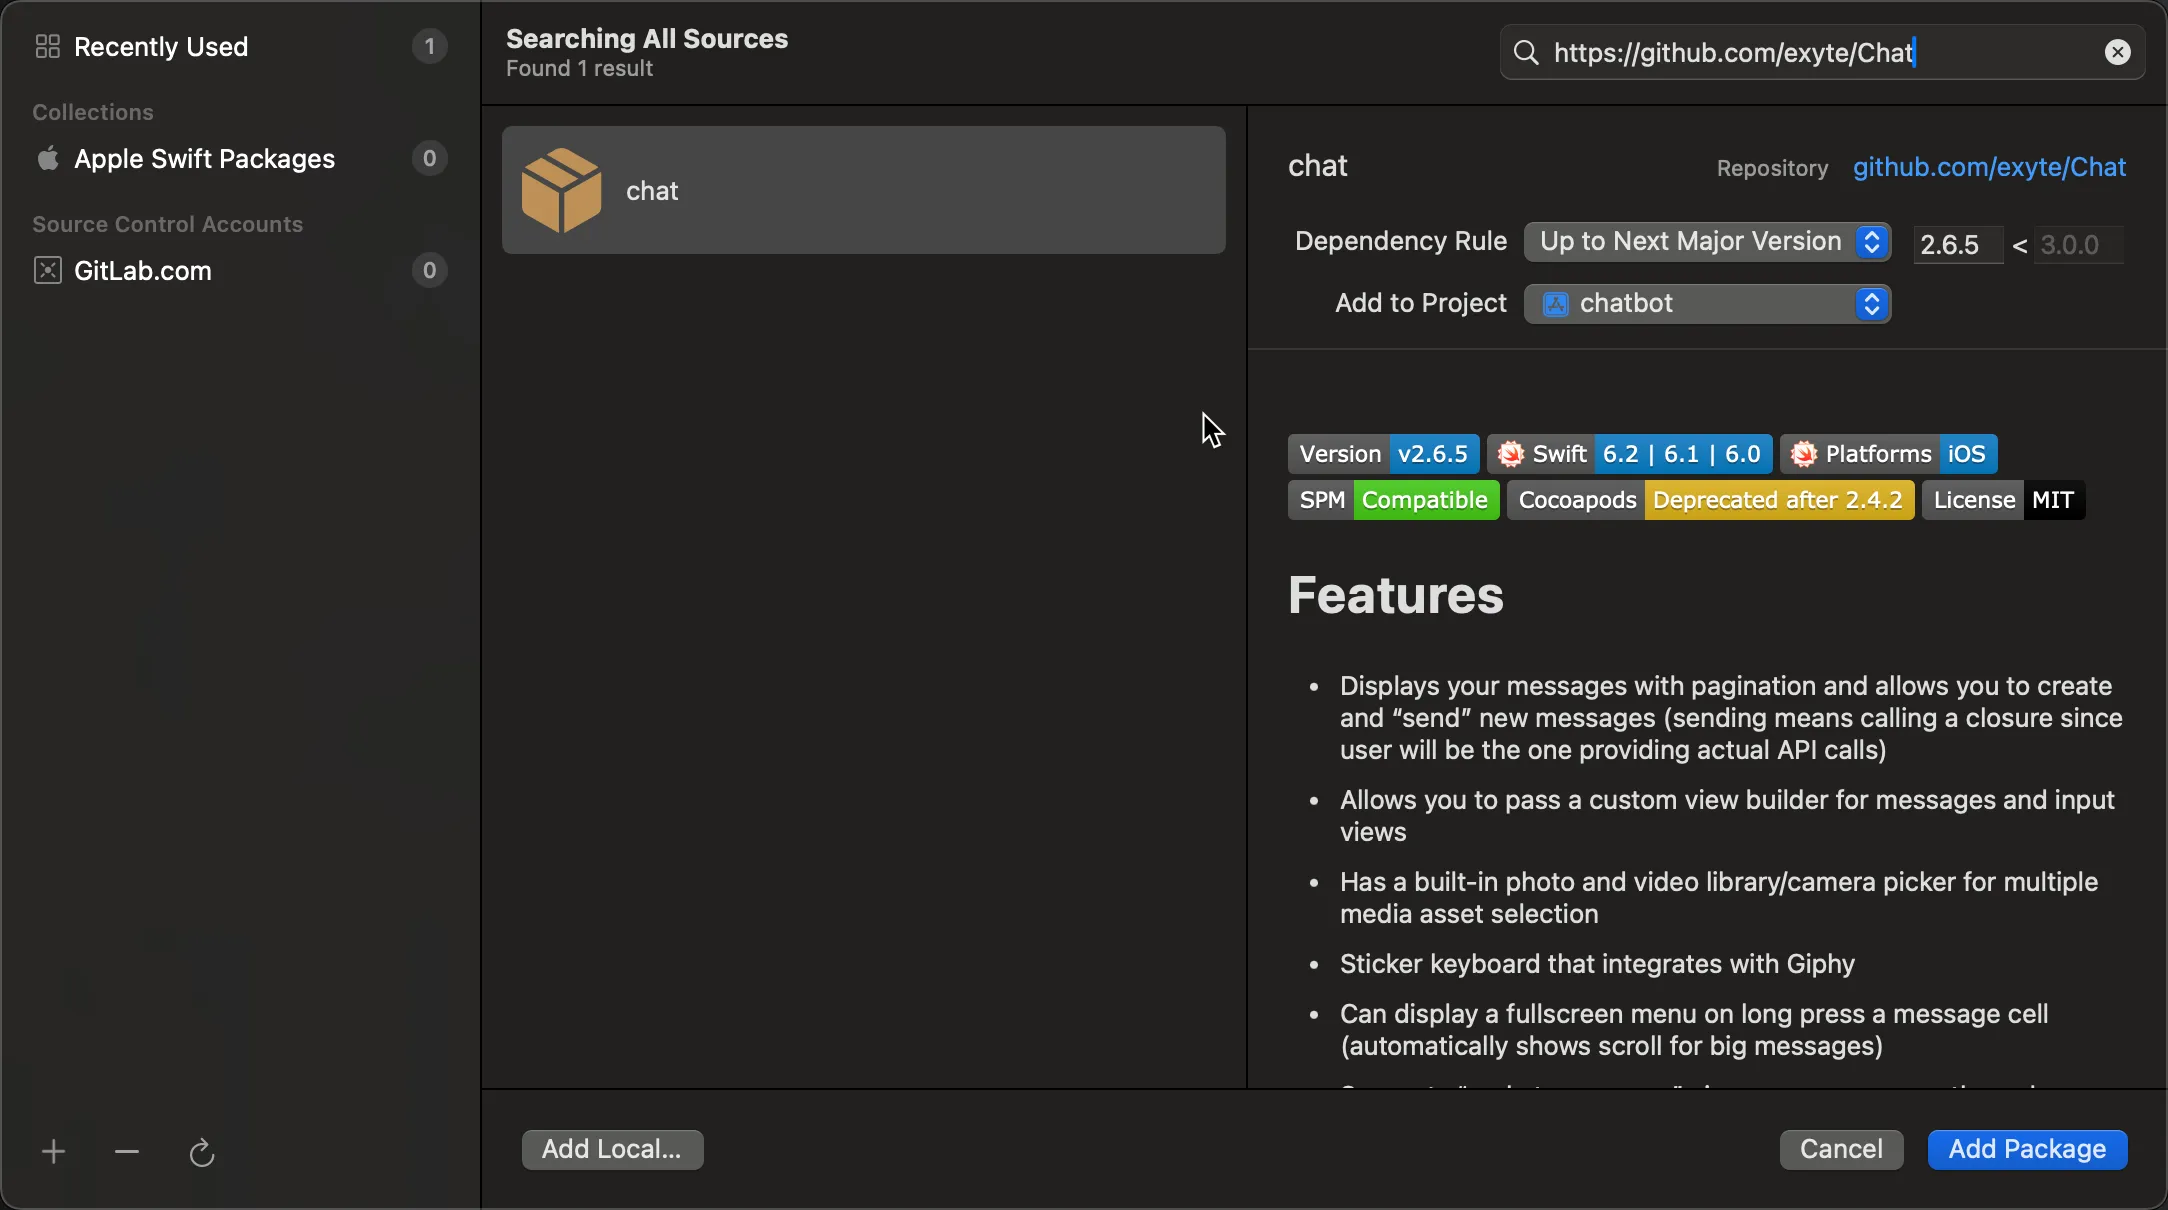
In Xcode: Project navigator > Select your project > Package Dependencies > “+” button.
Search or paste the package URLs and select suitable versions (the reference project uses ExyteChat v2.6.5 and MacPaw OpenAI v0.4.6).
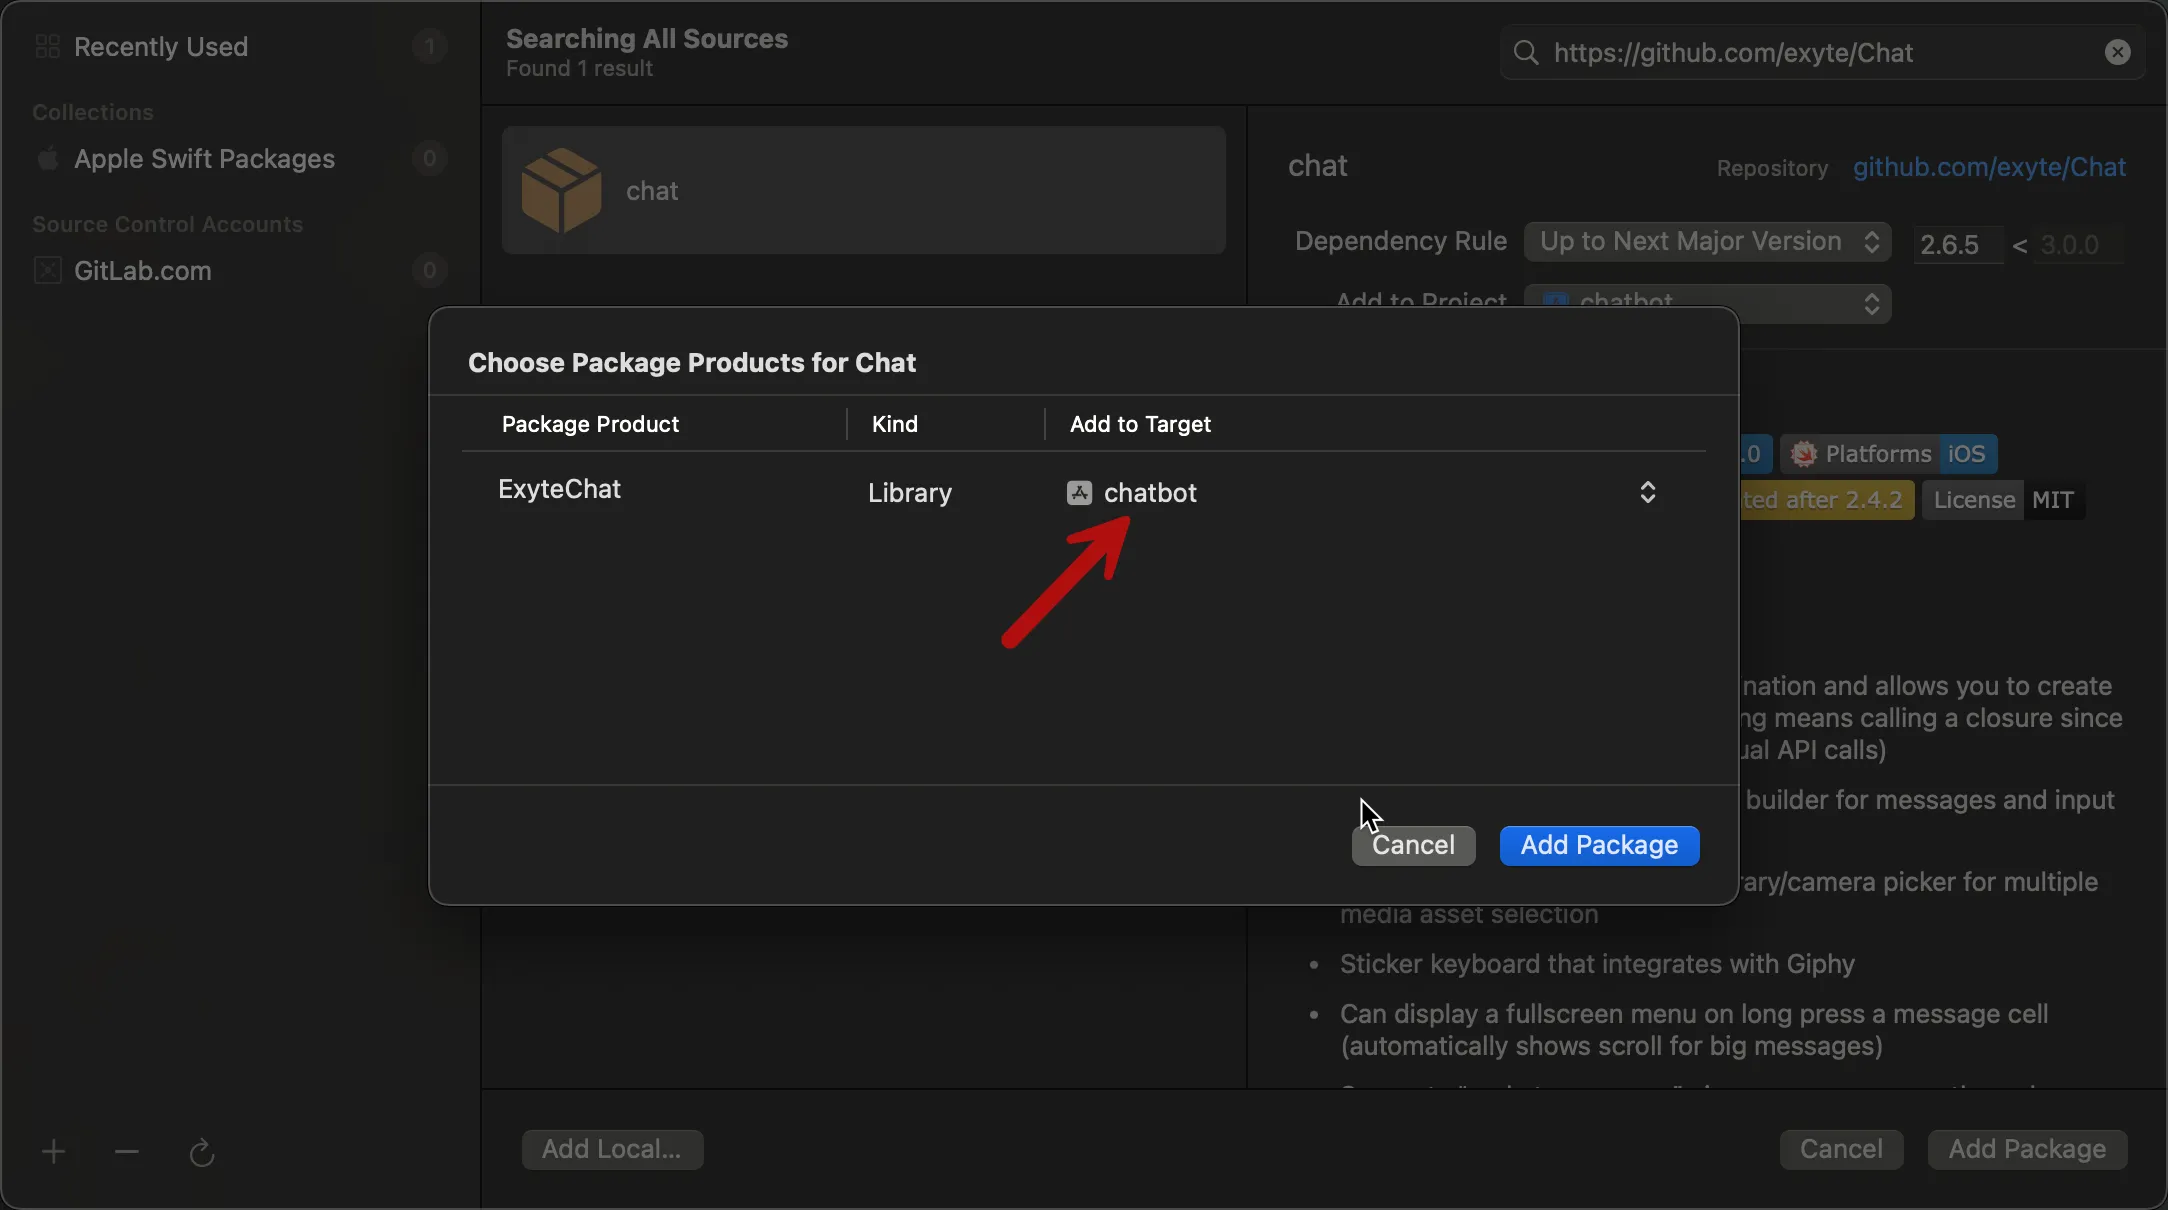
Finally, add the packages to your app target:
3) Set up the OpenAI client and view model
Create a new Swift file ChatViewModel.swift and initialize the MacPaw OpenAI client with your API key.
@MainActor
class ChatViewModel: ObservableObject {

    private let openAI: OpenAI
    @Published var messages: [Message] = []

    init() {
        // TODO: store this api key in keychain:
        self.openAI = OpenAI(apiToken: "YOUR_OPENAI_API_KEY_HERE")

        let welcomeMessage = createMessage(userId: "bot", text: "Hey! What's up?")
        messages.append(welcomeMessage)
    }

    func send(draft: DraftMessage) {
        let userMessage = createMessage(userId: "user", text: draft.text, createdAt: draft.createdAt)
        messages.append(userMessage)

        // Create initial bot message for streaming
        let botMessageId = UUID().uuidString
        let botMessage = createMessage(messageId: botMessageId, userId: "bot", text: "typing...", status: .sending)
        messages.append(botMessage)

        // Start OpenAI response
        Task {
            await getOpenAIResponse(userText: draft.text, botMessageId: botMessageId)
        }
    }

    private func getOpenAIResponse(userText: String, botMessageId: String) async {
        // Create conversation context with all messages
        var chatMessages: [ChatQuery.ChatCompletionMessageParam] = [
            .system(.init(content: .textContent("You're a cheerful chatbot who brings joy and humor to every conversation. You answer with very very short and concise answer")))
        ]

        // Add recent conversation history (last 10 messages to keep context manageable)
        let recentMessages = messages.suffix(10)
        for message in recentMessages {
            if message.user.isCurrentUser {
                chatMessages.append(.user(.init(content: .string(message.text))))
            } else if message.id != botMessageId { // Don't include the message we're currently generating
                chatMessages.append(.assistant(.init(content: .textContent(message.text))))
            }
        }

        let query = ChatQuery(
            messages: chatMessages,
            model: .gpt5_nano,
            stream: false
        )

        // Get the complete response from OpenAI
        // TODO: add error handling (see github project)
        let result = try! await openAI.chats(query: query)

        if let content = result.choices.first?.message.content {
            // Update the bot message with the complete response
            if let messageIndex = messages.firstIndex(where: { $0.id == botMessageId }) {
                var updatedMessage = messages[messageIndex]
                updatedMessage.text = content
                updatedMessage.status = .sent
                messages[messageIndex] = updatedMessage
            }
        }
    }
}
Security tip: For production, store the API key in the Keychain or use a configuration layer—don’t hardcode it.
4) Build the chat UI with ExyteChat
Create a simple SwiftUI view that renders your messages and sends new ones:
struct ChatGoalView: View {
    @StateObject private var chatViewModel = ChatViewModel()

    var body: some View {
        ChatView(messages: chatViewModel.messages) { draft in
            chatViewModel.send(draft: draft)
        }
        // If you remove this, the chat interface will allow to send images, audio, etc.
        // You can decide to support these inputs, but you will need to handle the message
        // in the view model and send the media item to the proper model/endpoint in order
        // to analyze it with your chatbot.
        .setAvailableInputs([AvailableInputType.text])
        .navigationTitle("You funny chatbot")
        .navigationBarTitleDisplayMode(.inline)
    }
}
Hook ChatScreen into your app entry point (e.g., ContentView).
5) Run it
Select a simulator and press Cmd+R. You should be able to type a message and receive a response.
If you want to compare with a working example and explore more features (local avatar for your bot, streaming, etc.), see the reference project: GitHub – GuillaumeBlanchet/chatbot.
Streming the response of the chatbot
If you want to stream the response of the chatbot, you can use the chatsStream method of the OpenAI wrapper provided by the MacPaw library with the stream parameter set to true in the ChatQuery object:
    let query = ChatQuery(
        // OpenAI MacPaw doesn't support gpt5_nano yet for streaming, so we use gpt4_1_nano
        messages: chatMessages, model: .gpt4_1_nano,
        temperature: 0.7,
        stream: true
    )

    var streamText = ""

    for try await result in openAI.chatsStream(query: query) {
        // etc.
See the streaming version of the chatbot in the reference project: GitHub – GuillaumeBlanchet/chatbot streaming branch.
One thing to note is that the streaming version is not yet supported for GPT5 models in the MacPaw library, see: https://github.com/MacPaw/OpenAI/issues/378 for more details and updates.
Next steps
- Customize system prompts to change the assistant personality;
- Add error states and retries for a more robust UX;
- Implement a RAG (Retrieval-Augmented Generation) system to improve the chatbot’s responses by providing your company documentation;
- Add a other types of input to the chatbot (images, audio, etc.);
- etc.